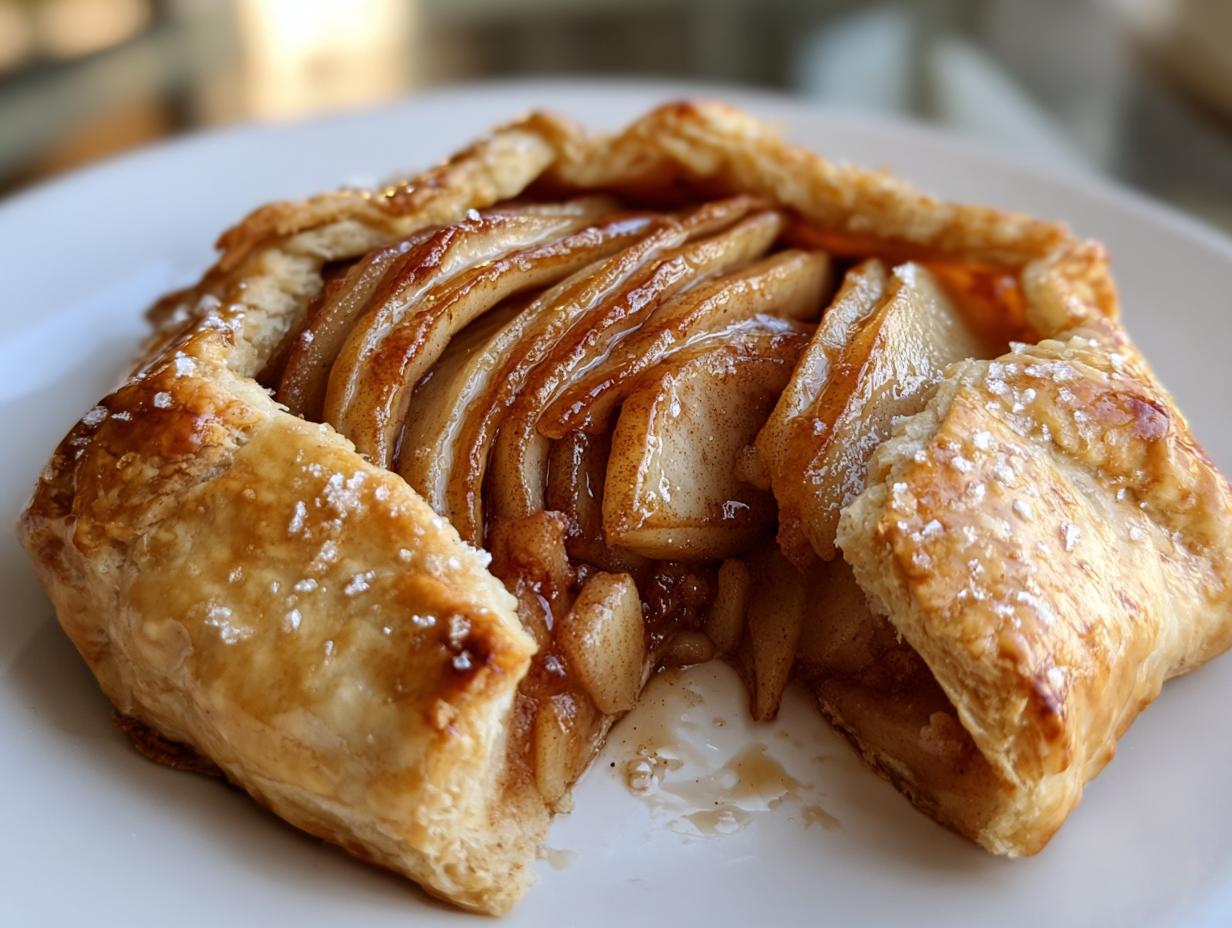
No heading needs to be written for the introduction. There’s something magical about a Spiced Pear Galette—it’s like autumn wrapped in a flaky, golden crust. I first fell in love with this dessert when I was desperate for a quick but impressive treat during a last-minute dinner party. The beauty of a galette? It doesn’t need to be perfect—those rustic, folded edges are part of its charm. And let me tell you, the moment those warm cinnamon-kissed pears mingle with buttery pastry, you’ll forget all about fussy pies.
This recipe became my go-to when pears piled up at the farmers’ market. It’s simpler than pie but just as rewarding—no fancy lattice work, no stress. Just slice, spice, and fold. The scent of cinnamon and nutmeg wafting through my kitchen instantly transports me to cozy fall afternoons. Trust me, once you try this Spiced Pear Galette, you’ll understand why I make it on repeat every September through November (and okay, sometimes in December too).
Why You’ll Love This Spiced Pear Galette
This Spiced Pear Galette is the kind of dessert that makes you look like a baking pro with minimal effort. Here’s why it’s become my absolute favorite:
- Effortless elegance: Rustic charm means no perfection required—those uneven folds? Totally intentional.
- Warm spices that hug you: Cinnamon and nutmeg turn simple pears into something magical—like autumn in every bite.
- Faster than pie: Skip the fuss of crimping and blind baking—this comes together in about half the time.
- Forgiving dough: Even if your rolling pin skills are shaky (mine still are!), the galette’s free-form style saves the day.
- Versatile serving: Equally stunning on a fancy platter or eaten straight from the baking sheet (no judgment here).
The best part? That golden, flaky crust shattering to reveal tender spiced pears—it’s pure comfort food magic.
Ingredients for Spiced Pear Galette
Let’s talk ingredients—because the magic of this Spiced Pear Galette starts with simple, high-quality stuff. I always say, the better your ingredients, the better your galette. Here’s what you’ll need, broken down into crust and filling:
For the Crust:
- 1 1/2 cups all-purpose flour: The foundation of your flaky, buttery crust.
- 1/2 teaspoon salt: Just enough to balance the sweetness.
- 1/2 cup cold unsalted butter, cubed: Cold is key here—it’s what gives the crust its layers.
- 4-5 tablespoons ice water: Keeps the dough tender and easy to work with.
For the Filling:
- 3 medium pears, thinly sliced: Firm pears like Bosc or Anjou work best—they hold their shape beautifully.
- 2 tablespoons packed brown sugar: Adds a rich, caramel-like sweetness.
- 1 teaspoon cinnamon: The star spice—warm and cozy in every bite.
- 1/4 teaspoon nutmeg: A little goes a long way to deepen the flavor.
- 1 tablespoon lemon juice: Brightens up the pears and keeps them from browning.
For Finishing:
- 1 egg, beaten: For that gorgeous golden crust.
- 1 tablespoon coarse sugar: A sprinkle of crunch and sparkle.
That’s it! Simple, right? But trust me, when these ingredients come together, they create something extraordinary. Now, let’s get baking!
Essential Equipment
One of the best things about this Spiced Pear Galette? You don’t need fancy gadgets to make it shine. Here’s what I always pull from my kitchen:
- Rolling pin: My trusty wooden one has seen better days, but it gets the job done every time.
- Large baking sheet: No need for a special tart pan—parchment-lined sheet pan is perfect.
- Mixing bowls: One for the crust, one for tossing those gorgeous pears.
- Pastry brush: For that golden egg wash finish (though fingers work in a pinch!).
- Sharp knife: Makes quick work of slicing pears evenly.
That’s seriously it—see why I love this recipe? Now let’s get to the fun part!
How to Make Spiced Pear Galette
Now comes the fun part—let’s turn those simple ingredients into a showstopping dessert. I’ve broken it down into three easy steps that even my pastry-challenged sister can follow (trust me, if she can do it, anyone can). The key? Take your time and enjoy the process—baking should feel like therapy, not a race.
Prepare the Crust
First things first: that flaky, buttery crust. The secret? Keep everything cold—I can’t stress this enough. I’ve ruined enough crusts by rushing this step to know better now.
Start by mixing your flour and salt in a large bowl. Then grab that cold cubed butter—I like to pop mine in the freezer for 10 minutes beforehand. Use your fingers or a pastry cutter to work the butter into the flour until it looks like coarse crumbs with some pea-sized bits remaining. Those butter pockets? They’re your ticket to flaky layers.
Now, drizzle in the ice water 1 tablespoon at a time, mixing gently with a fork until the dough just comes together. You want it to hold when pinched—not too sticky, not too dry. Form it into a disk (don’t overwork it!), wrap in plastic, and chill for at least 30 minutes. This rest time lets the gluten relax and prevents shrinkage later. Pro tip: I sometimes make the dough ahead and keep it chilled overnight—just let it sit at room temp for 10 minutes before rolling.
Assemble the Spiced Pear Filling
While the dough chills, let’s tackle those beautiful pears. Peel them if you like (I often leave the skin on for texture), then slice them about 1/4-inch thick—too thin and they’ll turn to mush, too thick and they won’t cook evenly.
Toss the slices with brown sugar, cinnamon, nutmeg, and that crucial tablespoon of lemon juice in a large bowl. The lemon does double duty—it prevents browning and adds a bright note that balances the spices perfectly. I like to let this mixture sit for 10 minutes so the pears release some juice (this creates a light syrup that caramelizes beautifully). Just give it one more gentle toss before assembling to make sure every slice is evenly coated in those warm spices.
Shape and Bake the Galette
Here’s where the magic happens! Preheat your oven to 375°F (190°C) and line a baking sheet with parchment. Roll your chilled dough on a lightly floured surface into about a 12-inch circle—don’t stress about perfection, rustic edges are charming. Transfer it to your prepared sheet (I fold it gently in quarters to move it easily).
Arrange those spiced pears in the center, leaving a 2-inch border. Then comes my favorite part—fold the edges up over the filling, pleating as you go. Those imperfect folds are what give galettes their character! Brush the crust with beaten egg (this gives that gorgeous golden color) and sprinkle with coarse sugar for a delightful crunch.
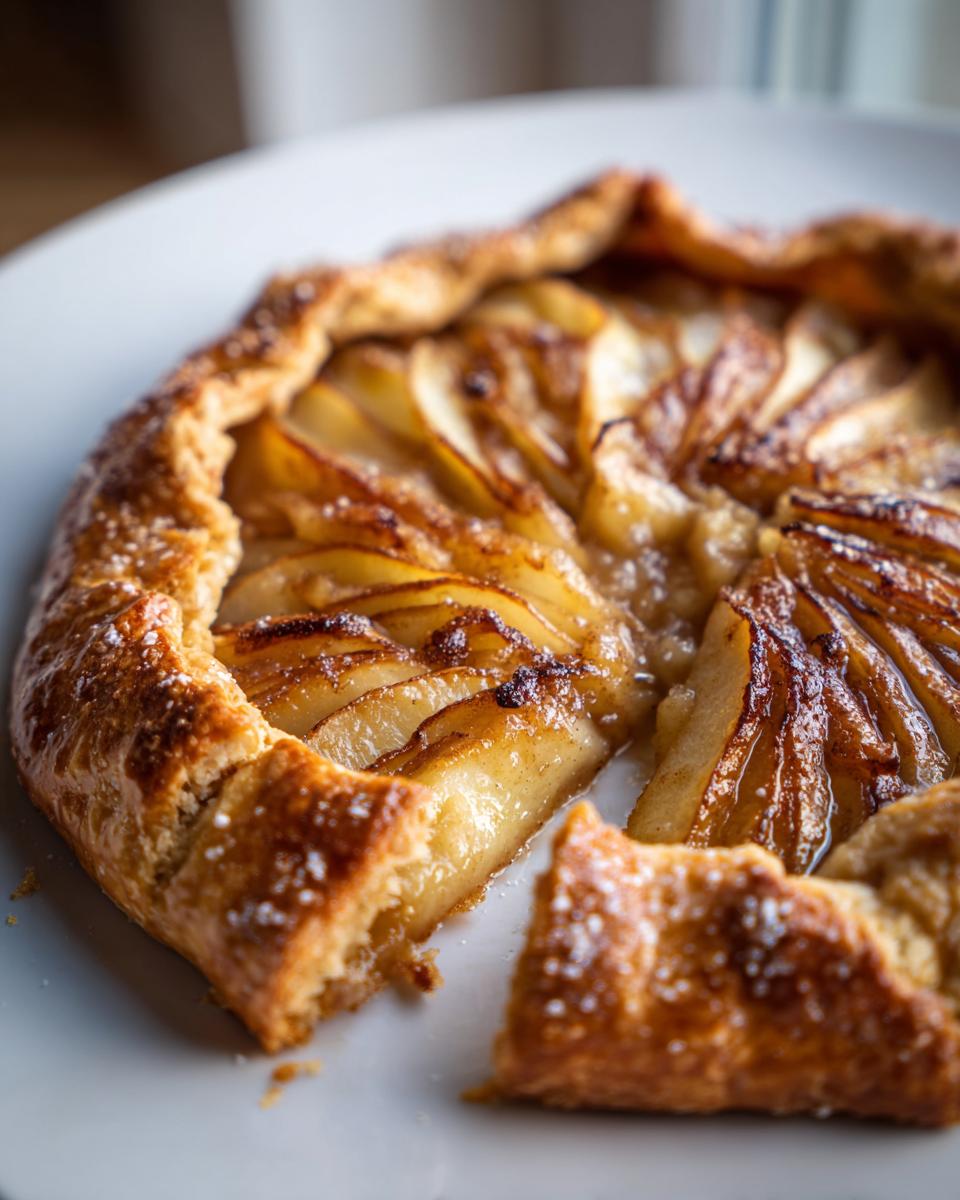
Bake for 35-40 minutes until the crust is deeply golden and the pear juices are bubbling. Your kitchen will smell like a cinnamon-scented dream at this point. Let it cool just slightly before slicing—I know it’s tempting to dive right in, but those pears are lava-hot! The wait is worth it when you get that first bite of flaky crust and tender, spiced pears.
Expert Tips for Perfect Spiced Pear Galette
After making this Spiced Pear Galette more times than I can count (okay, fine – at least twice a month during fall), I’ve learned all the little tricks that take it from good to “oh-my-goodness-what-is-this-magical-dessert” status. Here are my hard-earned secrets:
Don’t overwork that dough!
I learned this the hard way when I ended up with a tough crust that could’ve doubled as a hockey puck. The key is to handle the dough just until it comes together – those visible butter streaks are your friends! When mixing, stop as soon as you can squeeze a handful without it crumbling. Over-kneading activates the gluten and makes the crust tough instead of tender and flaky.
Slice pears just right
Too thin and they’ll turn to mush; too thick and they won’t soften properly. Aim for 1/4-inch slices – about the thickness of a pencil. And don’t stress about perfect uniformity! I actually like some variation – it creates different textures in the finished galette. Pro tip: if your pears are super juicy, pat them dry slightly after tossing with spices to prevent a soggy bottom.
Baking sheet matters more than you’d think
Always use a heavy-duty baking sheet – those thin ones can cause the bottom to burn before the filling’s done. And position your oven rack in the lower third – this helps the bottom crust crisp up while the filling bubbles away. If the edges start browning too fast (happens to me all the time!), just tent loosely with foil for the last 10 minutes.
The chill factor
I know, I know – waiting is hard when you’re craving dessert. But letting the shaped galette chill for 15 minutes before baking makes a world of difference. It keeps the butter cold longer in the oven, creating those beautiful flaky layers. I use this time to clean up and preheat the oven properly – two birds with one stone!
Remember – even if your galette isn’t picture-perfect (mine rarely are!), it’ll still taste incredible. The beauty of this dessert is in its rustic charm. Now go make some magic!
Serving Suggestions
Oh, the joy of serving this Spiced Pear Galette—it’s practically a blank canvas for all your favorite accompaniments! Here’s how I love to enjoy mine:
- Classic à la mode: A scoop of vanilla bean ice cream melting over warm galette is pure heaven—the cold creaminess against the spiced pears? Perfection!
- Caramel drizzle: My guilty pleasure—warm caramel sauce takes this from cozy to decadent in seconds (I won’t tell if you sneak an extra spoonful).
- Whipped cream clouds: Lightly sweetened cream with a hint of cinnamon makes every bite feel extra special.
- Cheese pairing: For a more sophisticated twist, serve with sharp cheddar or creamy brie—the salty-sweet combo is unexpectedly amazing.
- Morning treat: Leftovers? (As if!) Reheat gently and enjoy with coffee for the ultimate autumn breakfast.
No matter how you serve it, this Spiced Pear Galette always disappears fast—just last week, my book club polished one off before I could even grab my camera!
Storing and Reheating Your Spiced Pear Galette
Now, let’s talk about what to do with any leftovers (though between you and me, that’s rarely a problem in my house!). This Spiced Pear Galette actually keeps beautifully if you follow these simple storage tricks I’ve learned over the years.
Room temperature storage
If you’re serving the galette within 24 hours (like for a holiday gathering), just cover it loosely with a clean kitchen towel at room temperature. The crust stays wonderfully crisp this way – I often bake mine in the morning and serve it after dinner with zero loss in quality. Just make sure it’s completely cooled first to prevent condensation from making the bottom soggy.
Refrigerator storage
For longer storage (up to 3 days), wrap tightly in plastic wrap or store in an airtight container in the fridge. The crust will soften slightly, but here’s my trick: place individual slices on a baking sheet and pop them in a 350°F (175°C) oven for 5-7 minutes to crisp up again. The warmth also revives those lovely spice aromas!
Freezing for later
Yes, you can freeze this galette! I always make an extra to stash away for unexpected guests. Cool completely, then wrap tightly in plastic followed by foil. It’ll keep for about 2 months. To serve, I thaw overnight in the fridge, then reheat at 325°F (160°C) for 10-15 minutes until warmed through. The crust won’t be quite as flaky, but the flavors will still be amazing.
Reheating like a pro
For that just-baked experience, reheat slices in a toaster oven or conventional oven at 350°F (175°C) for about 5 minutes. The microwave works in a pinch but will make the crust chewy – though my husband swears even “chewy” galette is better than no galette! If the edges start getting too dark during reheating, just cover them with small pieces of foil.
One last tip: store any leftover filling separately from the crust if you can – it makes reheating much easier. But honestly? In my experience, this Spiced Pear Galette rarely lasts long enough to need complicated storage solutions. It’s that good!
Spiced Pear Galette Variations
One of the best things about this recipe is how beautifully it adapts to whatever you have on hand! I love playing with different variations depending on my mood and what’s in season. Here are some of my favorite twists on the classic Spiced Pear Galette that I’ve tested (and devoured) over the years.
Apples instead of pears
When pears aren’t looking their best at the market, I turn to apples without hesitation. Firm varieties like Granny Smith or Honeycrisp work wonderfully—they hold their shape and offer a slightly tangier flavor that balances the spices beautifully. Just slice them to the same 1/4-inch thickness, and you might need to add an extra minute or two to the baking time since apples can be a bit denser. This variation tastes like the classic apple pie’s cooler, more rustic cousin!
Cardamom instead of nutmeg
If you’re feeling a bit adventurous, swap that nutmeg for cardamom. I tried this after receiving a gorgeous batch of green cardamom pods from a friend, and wow—it adds this incredible floral, citrusy note that elev the whole dessert. Use about 1/4 teaspoon of ground cardamom (it’s more potent than nutmeg), and maybe add a tiny pinch of ginger too. It pairs especially well with a dollop of vanilla bean ice cream on top.
Adding nuts for crunch
For some extra texture, I love sprinkling chopped walnuts or pecans over the filling before folding up the crust. The nuts toast in the oven and add this wonderful crunch that contrasts with the tender pears. Just a quarter cup is plenty—any more and they might overwhelm the delicate fruit. This is my go-to variation when I’m serving the galette at holiday gatherings because it feels extra special.
Switching up the sweetener
While brown sugar gives that classic caramel note, I’ve had great success with maple syrup or honey too. Use about 3 tablespoons of either, and reduce the lemon juice to 2 teaspoons since these liquid sweeteners add their own moisture. The flavor becomes deeper and more complex—perfect for those cozy November evenings when you want something that tastes like a hug.
The beauty of the Spiced Pear Galette is how forgiving it is—don’t be afraid to make it your own! I’ve even thrown in a handful of dried cranberries when I felt like it needed some tartness. Baking should be fun, not rigid—so play around and find your perfect combination.
Nutrition Information
Okay, let’s talk numbers—but remember, these are just estimates based on my kitchen scale and calculator. Your actual Spiced Pear Galette nutrition might vary depending on your exact ingredients and how generous you are with that egg wash (no judgment here—I always go heavy on the coarse sugar too!).
Here’s the breakdown per serving (about 1/6th of the galette):
- Calories: Around 280 – consider it fuel for cozy autumn memories
- Sugar: 18g (mostly from the natural pear sweetness)
- Fat: 12g (thank that glorious butter for the flaky crust!)
- Fiber: 4g (peel those pears for less, keep skins on for more)
- Protein: 3g (who knew dessert could be this balanced?)
Important note: These values can change if you use different brands or swap ingredients (like coconut oil instead of butter). I always tell my friends—if you’re counting calories, maybe skip the extra scoop of ice cream…or don’t, because life’s too short not to enjoy every bite of this Spiced Pear Galette!
Frequently Asked Questions
Over countless Spiced Pear Galette baking sessions (and many happy taste-testers), I’ve fielded just about every question imaginable. Here are the ones that come up most often—answered with all my hard-earned kitchen wisdom!
Can I use frozen pears for this galette?
You absolutely can, but here’s my trick—thaw them completely first, then pat them very dry with paper towels. Frozen pears release more liquid, so I’ll often toss them with the spices, let them sit for 10 minutes, then drain any excess juice before assembling. The texture will be slightly softer than fresh, but the flavor is still wonderful. Just add an extra minute or two to the bake time to account for the extra moisture.
How do I prevent a soggy bottom crust?
Ah, the eternal galette dilemma! My three-pronged defense: 1) Make sure your dough is properly chilled before baking (cold butter = flakier crust). 2) Sprinkle a light dusting of breadcrumbs or ground almonds on the dough before adding pears—they’ll soak up excess juices. 3) Bake on the lower oven rack—the extra bottom heat helps crisp things up. If all else fails? Own that slightly soft center—it just means more caramelized pear goodness!
Can I make the dough ahead of time?
Yes, and I do this all the time! The dough keeps beautifully in the fridge for up to 3 days, or freeze it for a month (thaw overnight in the fridge before using). Just wrap it tightly in plastic—I like to flatten it into a disc first so it rolls out easier later. Some bakers swear by pre-rolling and freezing the shaped crust too, but I find fresh-rolled yields the flakiest results.
What’s the best pear variety to use?
My top picks are Bosc or Anjou—they hold their shape beautifully when baked. Bartletts work too but get softer faster. Avoid super-ripe Comice unless you want more of a pear butter texture (which honestly isn’t bad, just different!). Pro tip: slightly underripe pears work best—they have more structure and less watery juice that can make the crust soggy.
Can I double this recipe for a crowd?
Of course! I often make two galettes side-by-side on a large baking sheet when hosting. The dough doubles perfectly—just divide it into two equal disks before chilling. For the filling, I’ll sometimes mix up a triple batch of spiced pears since they keep well in the fridge for a few days (great for impromptu baking). Just know your kitchen will smell amazing and you’ll suddenly have more friends stopping by!
Final Thoughts
There you have it—my absolute favorite way to celebrate pear season! This Spiced Pear Galette has saved me from countless “I need a dessert NOW” moments and never fails to impress. Whether you’re baking for a special occasion or just treating yourself (because you deserve it!), this recipe delivers every time.
I’d love to hear how your galette turns out—did you stick with classic cinnamon or try one of the fun variations? Tag me on social @rusticbaker so I can see your beautiful creations! And if this recipe becomes your new go-to like it did mine, consider leaving a star rating to let others know just how magical that first bite of warm, spiced pears and flaky crust really is. You can find more inspiration on Pinterest.
Happy baking, friends—may your crusts always be golden and your pears perfectly spiced!
Print
Irresistible Spiced Pear Galette Recipe in 3 Easy Steps
- Prep Time: 20 minutes
- Cook Time: 40 minutes
- Total Time: 1 hour 30 minutes (includes chilling)
- Yield: 6 servings 1x
- Category: Dessert
- Method: Baking
- Cuisine: French
- Diet: Vegetarian
Description
A simple spiced pear galette with a flaky crust and warm cinnamon flavor.
Ingredients
- 1 1/2 cups all-purpose flour
- 1/2 tsp salt
- 1/2 cup cold unsalted butter, cubed
- 4–5 tbsp ice water
- 3 medium pears, thinly sliced
- 2 tbsp brown sugar
- 1 tsp cinnamon
- 1/4 tsp nutmeg
- 1 tbsp lemon juice
- 1 egg, beaten (for egg wash)
- 1 tbsp coarse sugar (for sprinkling)
Instructions
- Mix flour and salt in a bowl. Cut in butter until the mixture resembles coarse crumbs.
- Gradually add ice water, 1 tbsp at a time, until the dough comes together. Shape into a disk, wrap, and chill for 30 minutes.
- Preheat oven to 375°F (190°C).
- Toss pears with brown sugar, cinnamon, nutmeg, and lemon juice.
- Roll the dough into a 12-inch circle on a floured surface. Transfer to a baking sheet.
- Arrange pears in the center, leaving a 2-inch border. Fold edges over the filling.
- Brush crust with egg wash and sprinkle with coarse sugar.
- Bake for 35-40 minutes until golden brown.
- Cool slightly before serving.
Notes
- Use firm pears for better texture.
- Chill the dough to prevent shrinkage.
- Serve warm with vanilla ice cream if desired.
Nutrition
- Serving Size: 1 slice
- Calories: 280
- Sugar: 18g
- Sodium: 100mg
- Fat: 12g
- Saturated Fat: 7g
- Unsaturated Fat: 4g
- Trans Fat: 0g
- Carbohydrates: 40g
- Fiber: 4g
- Protein: 3g
- Cholesterol: 45mg
Keywords: spiced pear galette, easy dessert, cinnamon pear tart