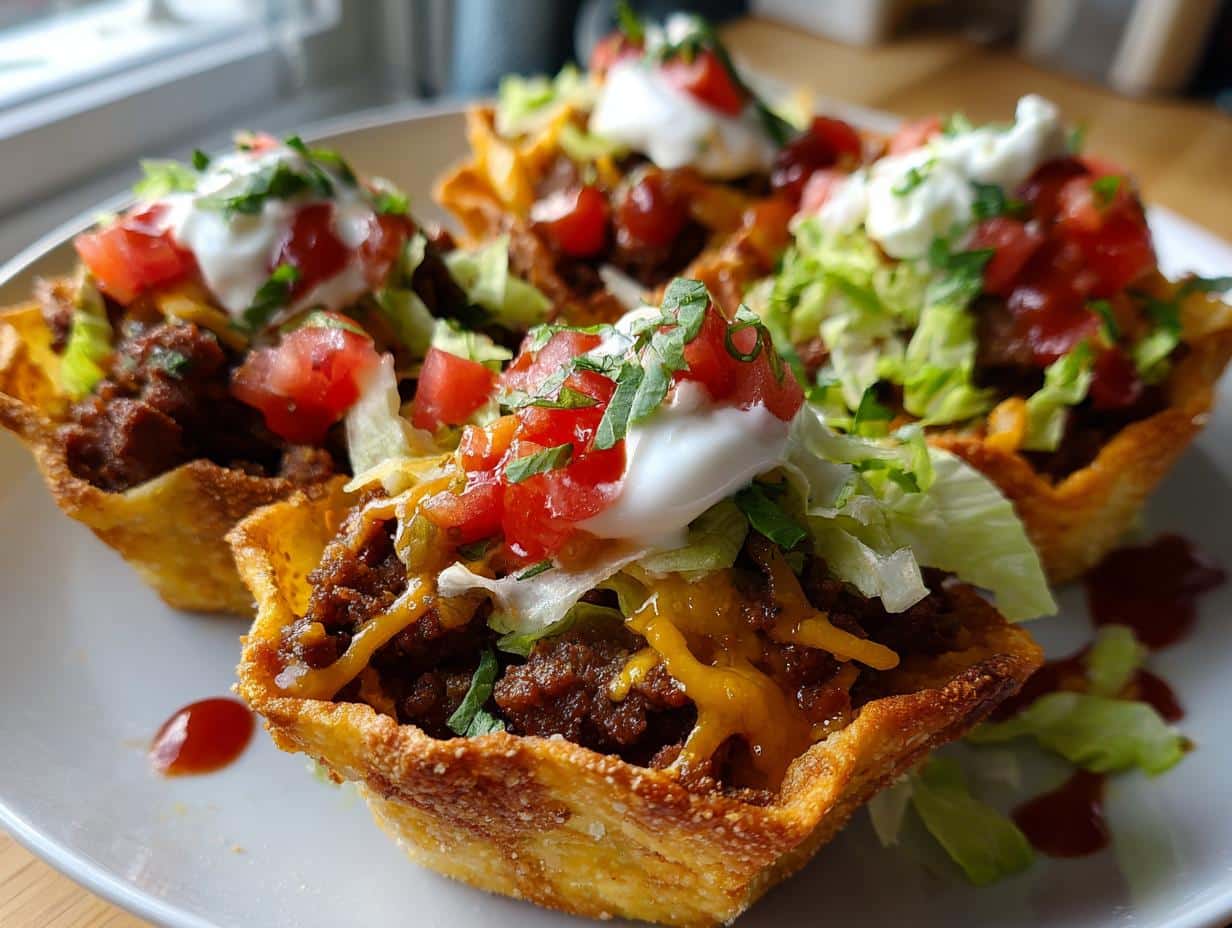
Oh my gosh, you have to try these taco cups! They’re my secret weapon for parties – always the first appetizer to disappear from the platter. I’ll never forget the first time I made them for my niece’s birthday. The kids went crazy for the crispy little cups filled with all their favorite taco flavors, and the adults? Let’s just say I had to make a second batch before halftime!
What I love most is how these taco cups solve all the messy taco problems – no drippy shells, no toppings falling everywhere. Just perfect, bite-sized portions of seasoned beef, melted cheese, and fresh toppings in a crispy edible bowl. And the best part? They come together in about 30 minutes flat. Game day, potlucks, even fancy dinner parties – these little guys work for every occasion.
Why You’ll Love These Taco Cups
Let me tell you why these taco cups are about to become your new go-to party snack:
- Super quick: From fridge to table in 30 minutes – perfect for last-minute guests!
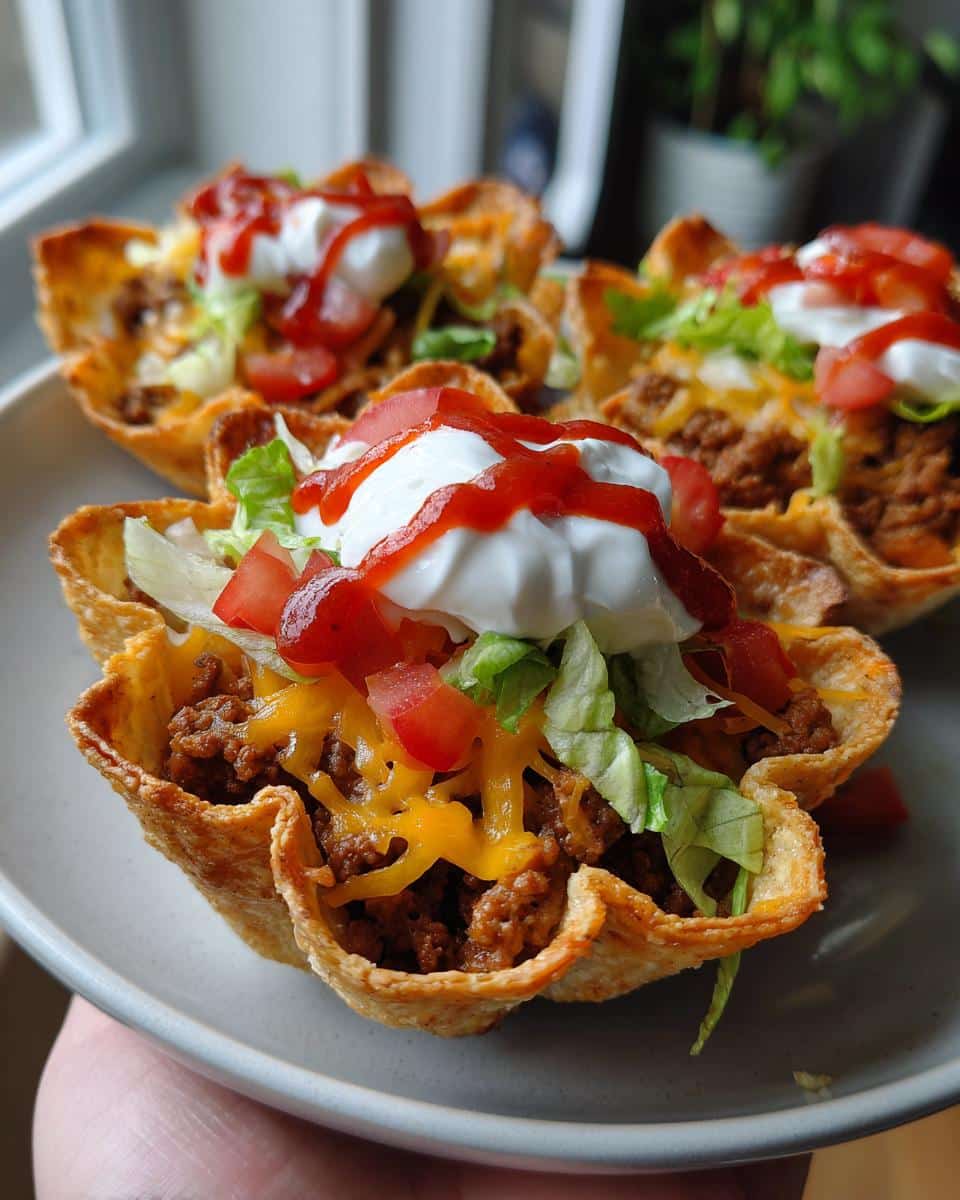
- Crispy perfection: That golden, crunchy tortilla cup holds everything together so you can eat with one hand (hello, game day!).
- Totally customizable: Swap beef for chicken, go vegetarian with beans, or add your favorite toppings – everyone gets exactly what they want.
- No mess: Forget taco night disasters – these neat little cups keep all the deliciousness contained.
- Kid-approved: The perfect size for little hands, and so fun to assemble together!
Ingredients for Taco Cups
Okay, let’s talk ingredients – because using the right stuff makes all the difference with these taco cups. Trust me, I’ve learned this the hard way after many test batches!
- 1 lb ground beef (85% lean) – That little bit of fat keeps the meat juicy and flavorful
- 1 packet taco seasoning – My secret? Use half the water called for to keep the filling thick
- 12 small flour tortillas (6-inch diameter) – Corn tortillas work too if you’re going gluten-free!
- 1 cup shredded cheddar cheese – Freshly grated melts so much better than pre-shredded
- 1/2 cup diced tomatoes – Drain them well or your cups will get soggy
- 1/4 cup chopped lettuce – Iceberg adds crunch, but romaine works great too
- 1/4 cup sour cream – For that cool, creamy finish
- 1/4 cup salsa – Choose your heat level – mild for kids, spicy for adults!
- 1 tbsp olive oil – Just enough to get those tortillas perfectly crisp
See? Simple, fresh ingredients you probably already have – that’s why I make these so often!
Equipment You’ll Need
Don’t worry – you don’t need anything fancy for these taco cups! Here’s what I grab from my kitchen:
- A standard 12-cup muffin tin (those $1 ones work perfectly!)
- Medium skillet for browning the beef
- Pastry brush or paper towel for oiling tortillas
- Sharp knife and cutting board for toppings
That’s it! See? I told you this recipe was easy.
How to Make Taco Cups
Alright, let’s get to the fun part – making these adorable taco cups! I promise it’s easier than it looks, and I’ll walk you through each step so yours turn out perfectly crisp and delicious every time.
Step 1: Prepare the Taco Filling
First things first – that amazing taco filling! Heat your skillet over medium and toss in the ground beef. Break it up with a wooden spoon while it cooks – you want nice, small crumbles. Once it’s fully browned (about 5-7 minutes), carefully drain off the excess grease (I tilt the pan and use a spoon to scoop it out).
Now, here’s my little trick – instead of adding the full amount of water the taco seasoning packet suggests, I use just half. This keeps the mixture nice and thick so it doesn’t make our cups soggy. Stir in the seasoning and let it all simmer together for about 5 minutes. You’ll know it’s ready when your kitchen smells like a Mexican restaurant!
Step 2: Shape and Bake the Tortilla Cups
While the meat simmers, preheat your oven to 375°F. Take each tortilla and brush both sides lightly with olive oil – this is the secret to getting them crispy, not chewy! Gently press them into the muffin tin cups, folding the edges to make a little bowl shape. Don’t stress if they tear a bit – they’ll still taste amazing.
Pop them in the oven for about 8-10 minutes. You’ll know they’re ready when they’re golden brown and hold their shape when you lift one out. Pro tip: if they puff up while baking, just press them down gently with a spoon – no big deal!
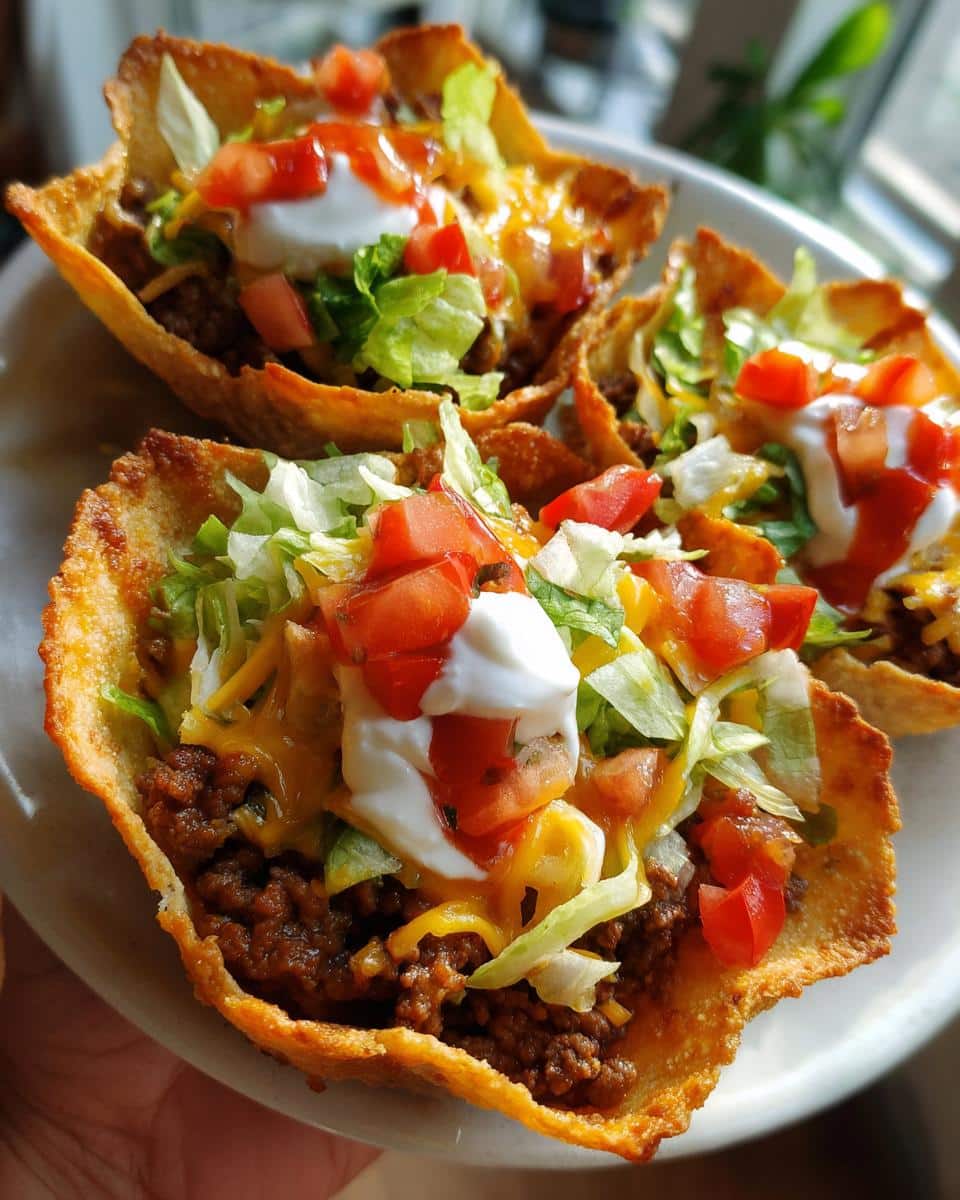
Step 3: Assemble the Taco Cups
Now for the best part – building your taco cups! Working quickly while the shells are still warm, spoon in about 2 tablespoons of the taco meat (it helps melt the cheese if the shells are hot). Top with a sprinkle of cheese – it’ll get all melty and perfect. Then add your toppings however you like!
Here’s the key: serve them immediately! The crisp tortilla cups are at their absolute best when they’re fresh from the oven. Watch how fast these disappear once you put them out – I guarantee you’ll be making another batch soon!
Tips for Perfect Taco Cups
After making these taco cups more times than I can count, here are my foolproof secrets for perfection:
- Double up: For extra-sturdy cups, use two tortillas per muffin cup – they’ll hold up better to hearty fillings!
- Prep ahead: Chop all your toppings first so assembly is lightning-fast when the cups come out of the oven.
- Drain everything: Blot tomatoes and rinse canned goods well – excess moisture is the enemy of crispy shells.
- Serve hot: Keep the oven on low while guests arrive – a quick 2-minute reheat keeps them perfectly crisp.
Trust me, these little tricks make all the difference between good taco cups and “holy cow, these are amazing!” taco cups!
Taco Cups Variations
Oh, the possibilities with these taco cups are endless! Here are some of my favorite twists to keep things exciting:
- Chicken fiesta: Swap beef for shredded rotisserie chicken mixed with taco seasoning – so juicy!
- Vegetarian delight: Black beans and sautéed peppers make a hearty meat-free version.
- Breakfast style: Fill with scrambled eggs, cheese, and crispy bacon for a morning treat.
- Spicy kick: Add diced jalapeños to the beef or top with hot sauce for heat lovers.
- Taco salad cups: Skip the meat and load up with greens, avocado, and ranch dressing.
See? One basic recipe, a million delicious possibilities – that’s why I never get tired of making these!
Serving Suggestions
These taco cups are fantastic on their own, but they really shine when you build a whole fiesta around them! I love serving them with a big bowl of cilantro-lime rice and a simple black bean salad. For portioning, plan on about 2-3 cups per person as an appetizer, or 4-5 if you’re making it a meal. Oh, and don’t forget the margaritas – they make everything better!
Storage and Reheating
Okay, here’s the deal – these taco cups are absolute perfection fresh out of the oven, but if you do have leftovers (which I never do!), here’s how to keep them tasty. Store them in an airtight container in the fridge for up to 2 days. When you’re ready to enjoy them again, skip the microwave – it’ll make them soggy! Instead, pop them in a 350°F oven for about 5 minutes to bring back that wonderful crispiness. The cheese will get melty again and they’ll taste almost as good as fresh! Pro tip: store the toppings separately and add them after reheating for maximum freshness.
Taco Cups Nutrition
Now, let’s talk nutrition – but remember, these numbers are just estimates since your toppings and ingredients might vary slightly from mine. For two taco cups (because let’s be real, who stops at just one?), you’re looking at about 280 calories, 18g of protein, and 20g of carbs. They’ve got 15g of fat (6g saturated), but hey – that’s what makes them so deliciously satisfying! The cheese and sour cream add some calcium, while the tomatoes and lettuce give you a little veggie boost. Not bad for such a fun, flavorful snack!
Frequently Asked Questions
Q1. Can I make taco cups ahead of time?
You bet! Prep the filling and chop toppings up to 2 days in advance, but bake the tortilla cups right before serving for maximum crispness. If you must assemble ahead, store components separately and reheat cups in the oven for 5 minutes at 350°F before adding toppings.
Q2. How do I keep my taco cups from getting soggy?
The secret is draining everything well – blot those tomatoes with paper towels! Also, go light on saucy toppings like salsa, and serve immediately after assembling. If you’re transporting them, pack toppings separately and assemble on-site.
Q3. Can I use corn tortillas instead of flour?
Absolutely! Corn tortillas make great gluten-free taco cups. Just warm them slightly first so they don’t crack when shaping. They’ll bake up extra crispy – I actually prefer them sometimes!
Q4. What’s the best way to reheat leftover taco cups?
Skip the microwave – it turns them rubbery. Instead, pop them in a 350°F oven for 5 minutes to revive that wonderful crunch. Add fresh toppings after reheating for best results.
Q5. Can I freeze assembled taco cups?
I don’t recommend it – the texture suffers. But you can freeze the baked tortilla cups (without fillings) for up to a month! Just thaw at room temperature and crisp them up in the oven before filling.
Try this recipe and share your twist in the comments – I’d love to hear how you make these taco cups your own!
Print
30-Minute Crispy Taco Cups That Disappear Instantly
- Prep Time: 15 mins
- Cook Time: 15 mins
- Total Time: 30 mins
- Yield: 12 taco cups 1x
- Category: Appetizer
- Method: Baking
- Cuisine: Mexican
- Diet: Low Lactose
Description
Crispy taco cups filled with seasoned meat, cheese, and fresh toppings.
Ingredients
- 1 lb ground beef
- 1 packet taco seasoning
- 12 small flour tortillas
- 1 cup shredded cheddar cheese
- 1/2 cup diced tomatoes
- 1/4 cup chopped lettuce
- 1/4 cup sour cream
- 1/4 cup salsa
- 1 tbsp olive oil
Instructions
- Preheat oven to 375°F.
- Cook ground beef in a skillet over medium heat until browned. Drain fat.
- Add taco seasoning and water as directed on packet. Simmer for 5 minutes.
- Brush tortillas lightly with olive oil and press into muffin tins to form cups.
- Bake tortilla cups for 8-10 minutes until crisp.
- Fill cups with cooked beef, cheese, and toppings.
- Serve immediately.
Notes
- Use corn tortillas for a gluten-free option.
- Customize toppings with avocado, jalapeños, or black beans.
- Store leftovers in an airtight container for up to 2 days.
Nutrition
- Serving Size: 2 taco cups
- Calories: 280
- Sugar: 2g
- Sodium: 450mg
- Fat: 15g
- Saturated Fat: 6g
- Unsaturated Fat: 7g
- Trans Fat: 0g
- Carbohydrates: 20g
- Fiber: 2g
- Protein: 18g
- Cholesterol: 50mg
Keywords: taco cups, easy appetizer, party food, Mexican recipe