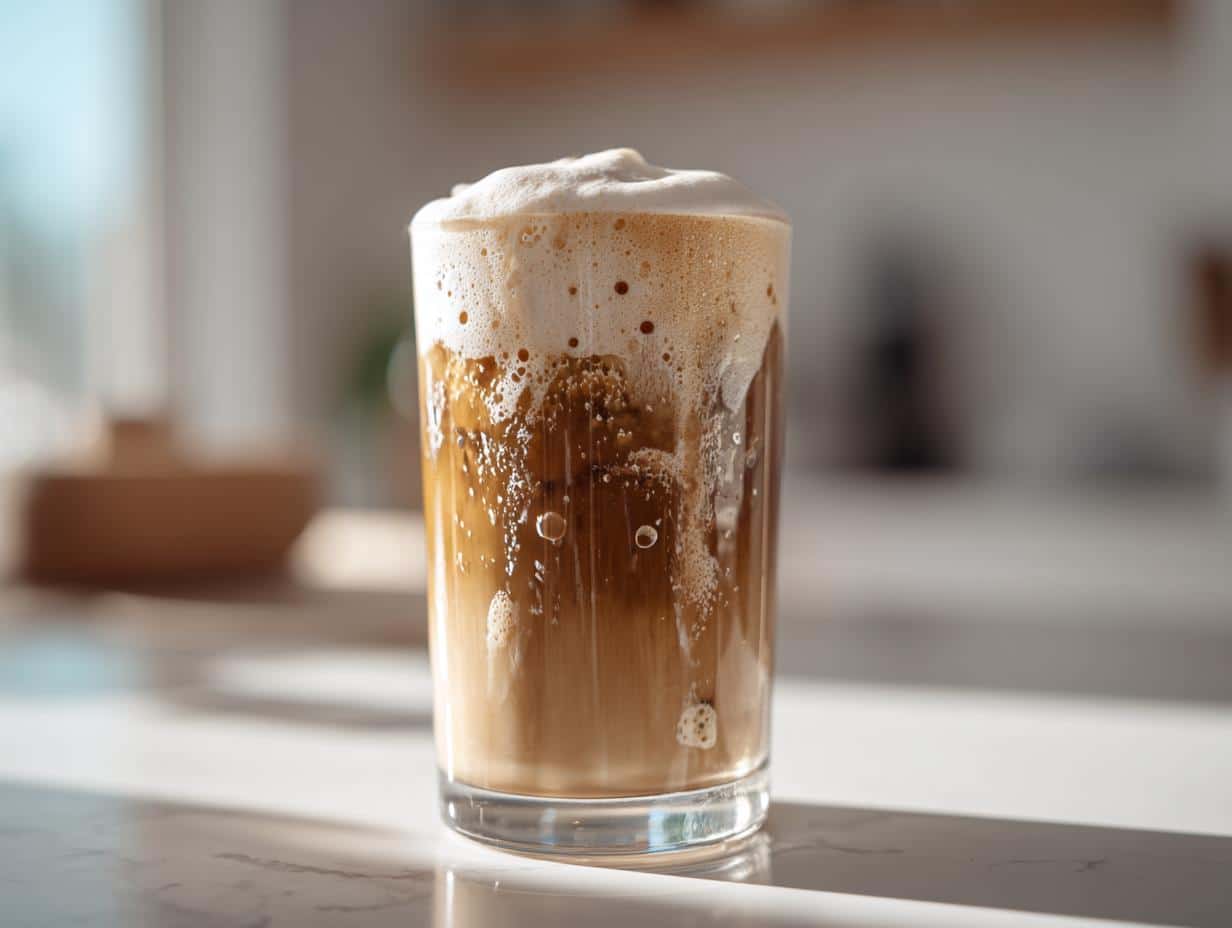
You know that dreamy, velvety layer floating on top of your favorite iced coffee? That’s coffee cold foam, and let me tell you—once you learn how easy it is to make at home, you’ll never pay for overpriced coffee shop drinks again. I remember the first time I tried making my own foam—I was skeptical it would work, but after one vigorous shake (and maybe a little kitchen dance), I had the perfect creamy topping. This simple trick takes your basic iced coffee from “meh” to “wow” in under two minutes. No fancy equipment needed—just a jar, a little elbow grease, and the magic of microwave physics!
Why You’ll Love This Coffee Cold Foam
- Quick: Ready in under 2 minutes—no waiting around!
- Creamy: Perfectly frothy and velvety, just like your favorite coffee shop’s.
- Customizable: Adjust the sweetness or add your favorite flavors.
- Better than store-bought: Fresh, simple, and made with ingredients you trust.
Ingredients for Coffee Cold Foam
This couldn’t be simpler—just three basic ingredients you probably already have in your kitchen. Trust me, the quality matters here. You’ll need:
- 1/2 cup cold whole milk (straight from the fridge—the colder, the better for frothing)
- 1 tsp granulated sugar (or more if you like it sweet)
- 1/4 tsp pure vanilla extract (skip the imitation stuff—it makes all the difference)
That’s it! I’ve tried all sorts of fancy variations, but this simple trio creates the perfect foam every time.
How to Make Coffee Cold Foam
Okay, here’s where the magic happens—and trust me, it’s way easier than you think. You don’t need any fancy gadgets, just a little arm workout and patience. Follow these steps closely, and you’ll have barista-worthy foam in no time!
Step 1: Combine Ingredients
Grab a mason jar or any container with a tight-sealing lid (I use a 12-ounce jar—it gives the milk plenty of room to dance around). Pour in your cold milk, sugar, and vanilla. Here’s my secret: toss in a pinch of salt if you’re feeling fancy—it makes the sweetness pop!
Step 2: Shake and Microwave
Now seal that jar like your coffee happiness depends on it (because it kinda does). Shake like you’re trying to wake up your neighbor—really go for it! At least 30 seconds of vigorous shaking creates those perfect tiny bubbles. Then, oh-so-carefully remove the lid (watch out—it’ll be pressurized!) and microwave for exactly 15 seconds. This stabilizes the foam so it doesn’t collapse.
Step 3: Final Shake and Serve
Give it one last 30-second shake—you’ll feel the texture transform from bubbly to luxuriously thick. When it coats the sides of the jar like velvety paint, it’s ready. Gently spoon it over your iced coffee and watch it float beautifully on top—no stirring needed!
Tips for Perfect Coffee Cold Foam
Here are my foolproof tricks for foam that’ll make your barista jealous:
- Chill everything: That milk needs to be ice-cold—I sometimes pop the jar in the freezer for 5 minutes first!
- Sweeten to taste: Start with 1 tsp sugar, then add more after tasting. Honey works beautifully too.
- Microwave carefully: 15 seconds max—any longer and you’ll cook the milk instead of stabilizing the foam.
- Shake with passion: Pretend you’re mixing a cocktail—those arm muscles create the magic texture.
- Work fast: Foam is happiest when used immediately after making it.
Follow these, and you’ll never have a flat foam again!
Variations for Coffee Cold Foam
The beauty of homemade foam? You can make it your own! Swap whole milk for oat milk if you’re dairy-free—it froths surprisingly well. Try maple syrup instead of sugar for autumn vibes, or add cinnamon right into the jar before shaking. My current obsession? A tiny pinch of cocoa powder shaken in—tastes like dessert!
Serving Suggestions for Coffee Cold Foam
Obviously, this foam belongs on iced coffee—but don’t stop there! Try it on cold brew for extra richness, or get wild and dollop it over chocolate pudding or vanilla ice cream. Sweet dreams are made of this!
Storage & Reheating
Got leftover foam? No problem! Transfer it to an airtight container—it keeps in the fridge for up to 2 days. When you’re ready to use it, just give it another quick shake to fluff it back up. The foam won’t be quite as perfect as fresh, but it’ll still taste amazing on your next coffee!
Coffee Cold Foam FAQs
Can I use non-dairy milk for coffee cold foam?
Absolutely! Oat milk and almond milk work surprisingly well—just shake extra vigorously. Coconut milk makes a dreamy tropical version, though it won’t get quite as fluffy. The key is using the “barista blend” versions if available—they’re formulated to froth better.
Why do you microwave the foam?
That quick 15-second zap stabilizes the bubbles so your foam stays thick instead of collapsing. It’s like magic—the gentle heat helps the proteins in milk set those perfect little frothy pockets in place. Just don’t overdo it, or you’ll cook the milk!
My foam turned out runny—what went wrong?
Usually means one of three things: milk wasn’t cold enough (chill it first!), you didn’t shake hard enough (pretend you’re angry at the jar!), or the microwave step was skipped. If it happens, just pour the mixture back in the jar and repeat the shaking process.
Can I make this without sugar?
Of course! The sugar isn’t necessary for texture—just sweetness. Skip it entirely or use a sugar substitute. The vanilla still adds great flavor even without sweetener. My sugar-avoiding friend swears by a tiny pinch of cinnamon instead!
Why does my foam separate after sitting?
That’s totally normal—just give it a quick stir or shake before using again. The foam stabilizes best when fresh, but a little separation won’t affect the taste. If it bothers you, make smaller batches right before drinking.
Nutritional Information
Here’s the scoop on what’s in your foam (based on whole milk): about 50 calories, 5g sugar, and 2g fat per serving. Remember—these numbers dance around depending on your exact ingredients. Go lighter with skim milk or swap sweeteners if you’re counting closely!
Final Thoughts
Now that you’ve got the secrets to perfect coffee cold foam, I dare you to try it—just once! Trust me, your morning coffee will never be the same. Tag me when you do—I’d love to see your frothy creations! Check out more delicious recipes.
Print
Creamy Coffee Cold Foam in Just 2 Minutes – Easy & Delicious
- Prep Time: 2 mins
- Cook Time: 0 mins
- Total Time: 2 mins
- Yield: 1 serving 1x
- Category: Beverage
- Method: No-cook
- Cuisine: International
- Diet: Vegetarian
Description
A creamy, frothy topping for your iced coffee made with simple ingredients.
Ingredients
- 1/2 cup cold milk
- 1 tsp sugar
- 1/4 tsp vanilla extract
Instructions
- Pour milk, sugar, and vanilla into a jar.
- Seal the jar and shake vigorously for 30 seconds.
- Remove the lid and microwave for 15 seconds.
- Shake again for another 30 seconds until frothy.
- Spoon the foam over your iced coffee.
Notes
- Use whole milk for the creamiest texture.
- Adjust sugar to taste.
- Store leftover foam in the fridge for up to 2 days.
Nutrition
- Serving Size: 1/2 cup
- Calories: 50
- Sugar: 5g
- Sodium: 30mg
- Fat: 2g
- Saturated Fat: 1g
- Unsaturated Fat: 0.5g
- Trans Fat: 0g
- Carbohydrates: 6g
- Fiber: 0g
- Protein: 2g
- Cholesterol: 5mg
Keywords: coffee cold foam, iced coffee topping, homemade foam