I swear by quick-pickled red onions to jazz up almost anything in my kitchen. They’re my secret weapon when a dish needs that perfect tangy crunch—whether it’s piled high on tacos (my Tuesday night staple) or scattered over a boring green salad. The first time I made them, I couldn’t believe how something so simple—just onions, vinegar, and five minutes of effort—could transform meals so dramatically. Now I always keep a jar in my fridge. They’re ridiculously easy to make, ready in a flash, and add a punch of flavor that makes everyone think you fussed way more than you actually did. Trust me, once you try them, you’ll wonder how you ever ate a burger or bowl of beans without them.
Why You’ll Love These Quick-Pickled Red Onions
These quick-pickled red onions are a game-changer, and here’s why:
- Fast: Ready in under an hour—no waiting days for that tangy flavor.
- Versatile: They’re perfect on tacos, salads, sandwiches, or even avocado toast.
- Tangy Crunch: Adds a zesty bite that brightens up any dish.
- Easy: Just slice, pour, and chill—no fancy skills required.
- Always Ready: Keep a jar in your fridge for whenever you need a flavor boost.
Once you try them, you’ll wonder how you ever cooked without them!
Ingredients for Quick-Pickled Red Onions
Gathering your ingredients is the easiest part—you probably have most of these in your kitchen right now! Here’s what you’ll need to make the perfect tangy bite:
- 1 medium red onion – thinly sliced (about 1/8-inch thick for that ideal crunch)
- 1/2 cup white vinegar – plain distilled works great, but I sometimes use rice vinegar for a milder tang
- 1/2 cup water – just regular tap water is fine
- 1 tablespoon sugar – white granulated dissolves best, though honey works in a pinch
- 1 teaspoon salt – I use kosher salt, but table salt works too
That’s it! Five simple ingredients for magic. The red onion’s natural sweetness shines through, while the vinegar gives it that addictive zing. I always make a double batch because—trust me—you’ll go through these faster than you think!
How to Make Quick-Pickled Red Onions
Making these tangy gems couldn’t be simpler—I promise! Follow these steps, and you’ll have perfect pickled onions ready to jazz up your meals in no time. The key is patience (just a little!) while they cool and soak up all that delicious flavor.
Step 1: Prepare the Onions
First things first—let’s tackle those onions! Grab your sharpest knife (or a mandoline if you’re feeling fancy) and slice that beautiful red onion as thin as you can. I’m talking about 1/8-inch thick slices—thin enough to pickle quickly but thick enough to keep some satisfying crunch. Pro tip: slice pole-to-pole (from root to stem) for prettier crescent shapes that won’t fall apart in your tacos!
Step 2: Heat the Pickling Liquid
Now for the magic potion! In a small saucepan, combine your vinegar, water, sugar, and salt. Heat it over medium until you see tiny bubbles forming around the edges—don’t let it boil like crazy! Stir constantly until the sugar and salt completely disappear. This takes about 2 minutes in my kitchen. You’ll know it’s ready when the liquid turns clear again (no more cloudy sugar granules!).
Step 3: Combine and Cool
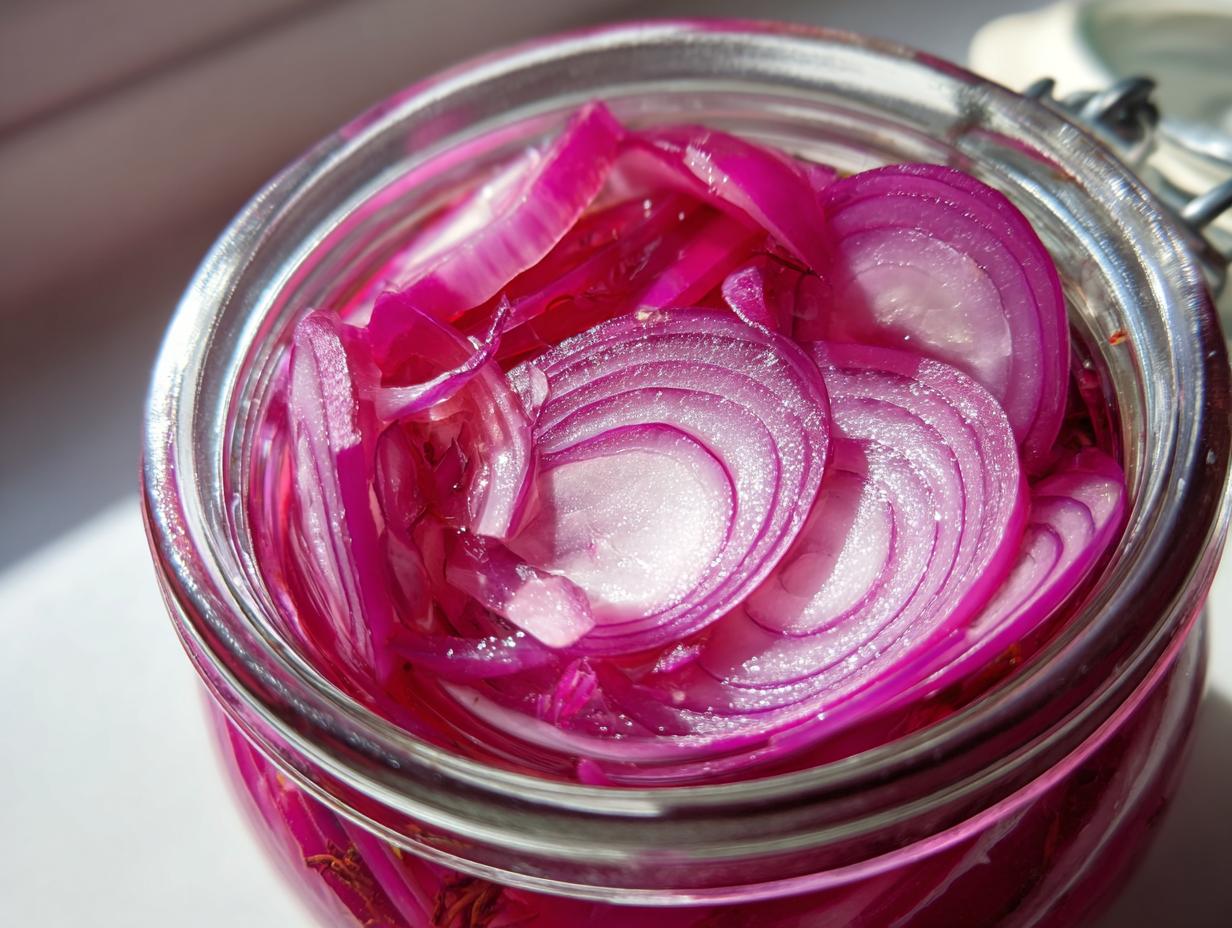
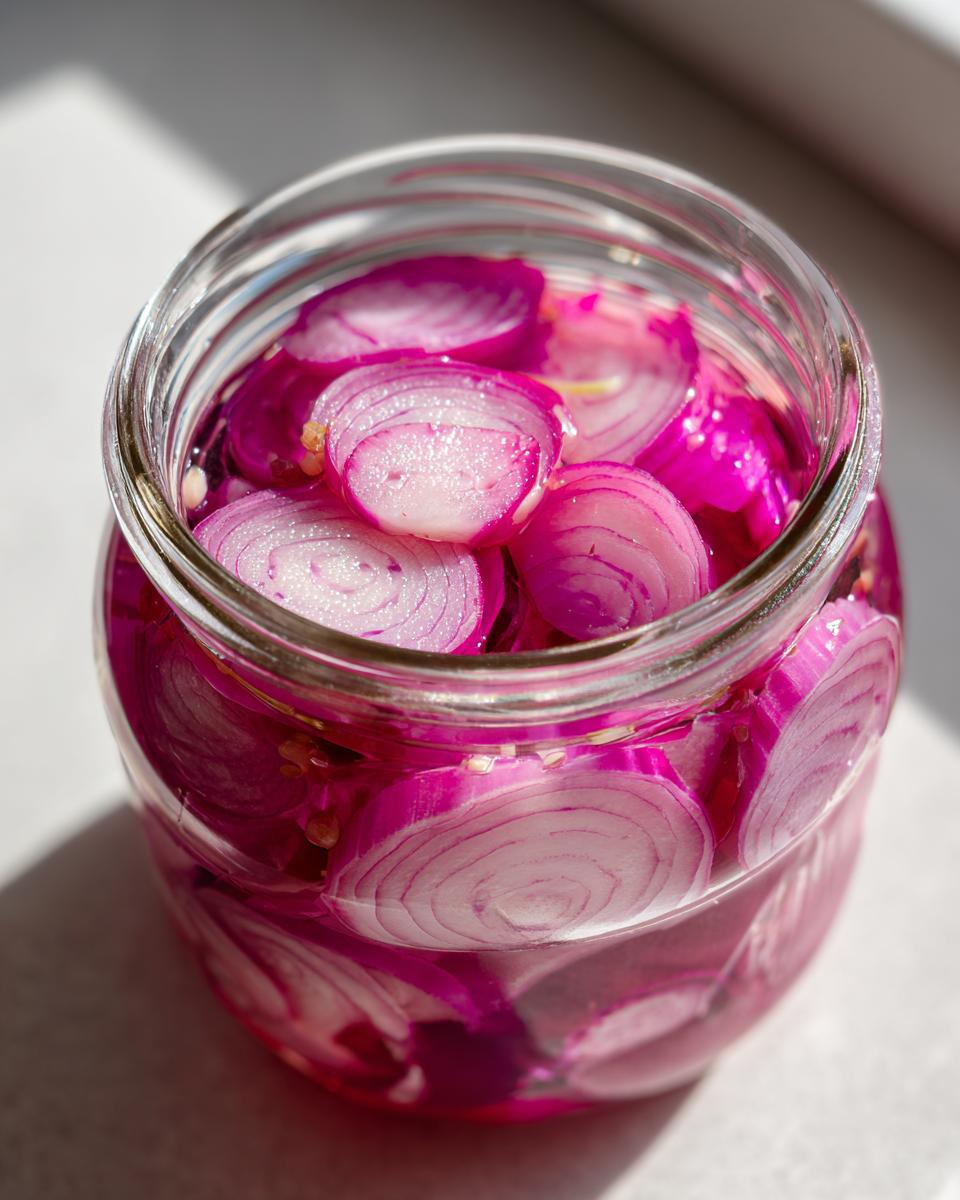
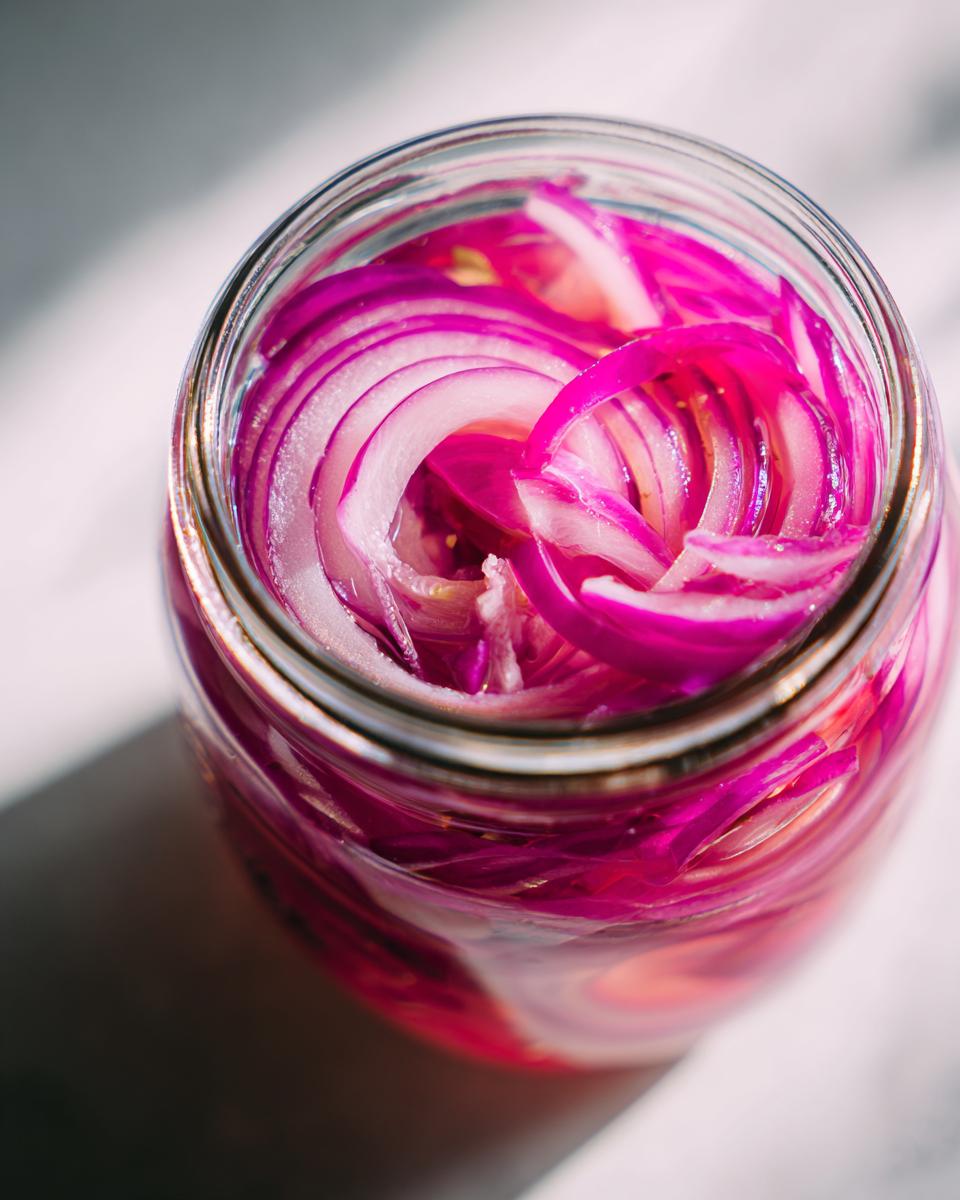
Here’s where the transformation happens! Pack those beautiful onion slices into a clean jar (I reuse old jam jars—no need for anything fancy). Carefully pour the hot liquid over them until they’re completely submerged. Now the hardest part—walk away! Let them cool uncovered on your counter for about 30 minutes. This helps them absorb the flavors perfectly. Then pop the lid on and refrigerate. They’re technically ready in 30 minutes, but I swear they taste even better after a couple hours when that vibrant pink color really develops!
Tips for Perfect Quick-Pickled Red Onions
After making these countless times (and eating way too many straight from the jar), here are my foolproof tips for pickle perfection:
- Slice smart: Use a mandoline for paper-thin, even slices—no more wonky onion pieces!
- Taste as you go: Like it sweeter? Add an extra pinch of sugar. Prefer more tang? A splash of vinegar does the trick.
- Pack tightly: Really stuff those onions into the jar so they stay submerged in the brine.
- Wait (if you can): The flavor gets better overnight—try not to eat them all immediately!
- Get creative: Toss in a smashed garlic clove or peppercorns for extra zing.
These little tweaks make all the difference between good pickled onions and wow pickled onions!
Ways to Use Quick-Pickled Red Onions
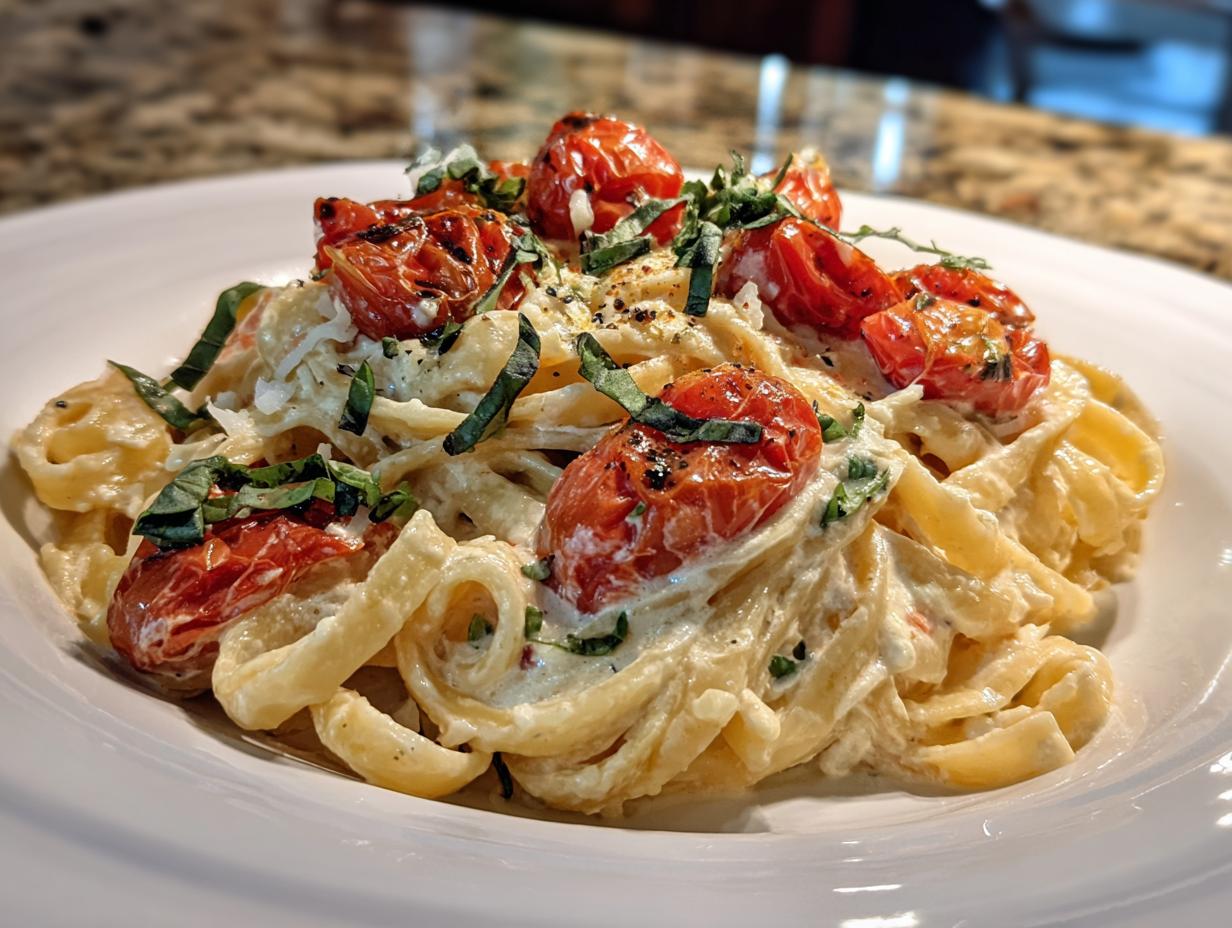
These tangy onions are my go-to for adding a pop of flavor to so many dishes! Pile them high on tacos for that perfect zing, toss them into salads for a bright crunch, or layer them on burgers and sandwiches for a flavor upgrade. They’re even amazing on avocado toast or grain bowls—seriously, the possibilities are endless!
Storage and Shelf Life
Once you’ve made your quick-pickled red onions (and resisted eating the whole jar in one sitting), storing them is a breeze! Pop them in the fridge in an airtight jar—I’m partial to reusing old mason jars or even those glass salsa jars from the store. They’ll keep their tangy crunch for up to 2 weeks, though in my house, they rarely last that long! Just make sure the onions stay fully submerged in the brine. If you notice any funky smells or changes in color, it’s time to say goodbye and whip up a fresh batch. Trust me, it’s so quick, you won’t mind starting over!
Quick-Pickled Red Onions Variations
Once you’ve mastered the basic recipe, try these fun twists! My favorite additions: a smashed garlic clove for depth, whole peppercorns for spice, or a pinch of red pepper flakes for heat. A bay leaf adds earthy notes, while a teaspoon of mustard seeds gives them a deli-style kick. The possibilities are endless—play around and make them your own!
Nutritional Information
Let’s be real – we’re not eating pickled onions for their nutritional benefits (though they’re not bad!), but here’s the scoop on what you’re getting in each tangy bite. Keep in mind these numbers can vary slightly depending on your exact ingredients, but per 2 tablespoon serving, you’re looking at:
- 10 calories – practically guilt-free!
- 1g sugar – just enough to balance the vinegar’s tang
- 120mg sodium – from the salt that makes all the flavors pop
- 0g fat – because delicious doesn’t have to mean heavy
- 2g carbs – mostly from the natural onion sugars
The best part? Unlike store-bought versions, you control exactly what goes in – no mystery preservatives or additives. Just simple, fresh ingredients that happen to be pretty light on calories while packing maximum flavor!
Common Questions About Quick-Pickled Red Onions
Got questions about these tangy little wonders? I’ve got answers! Here are the most common things people ask me about quick-pickled red onions—and my tried-and-true tips to help you nail them every time.
Can I use apple cider vinegar instead of white vinegar?
Absolutely! Apple cider vinegar adds a slightly sweeter, fruitier flavor that works beautifully. I use it all the time when I want a milder tang. Just keep the same 1:1 ratio of vinegar to water, and you’re golden.
How thin should I slice the onions?
Thin is the name of the game! Aim for about 1/8-inch thick slices—thin enough to pickle quickly but thick enough to keep some crunch. If you’re not confident with a knife, grab a mandoline for perfectly even slices every time.
Do I have to refrigerate them?
Yes, definitely! These are quick-pickled, not fermented, so they need to stay in the fridge to stay fresh. Kept in an airtight jar, they’ll last up to 2 weeks—if you don’t eat them all first!
Can I add other spices or flavors?
Oh, absolutely! I love tossing in a smashed garlic clove, a few peppercorns, or even a pinch of red pepper flakes for a little heat. A bay leaf or mustard seeds are also fantastic additions. Get creative and make them your own!
Why aren’t my onions turning pink?
Don’t worry—it’s totally normal! The vibrant pink color develops as the onions sit in the brine. If they’re still looking pale after 30 minutes, give them a few hours in the fridge. Trust me, they’ll get that beautiful hue soon enough!
For more delicious recipes and inspiration, check out Cooking with Judy on Pinterest.
Print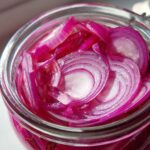
Tangy Quick-Pickled Red Onions in Just 5 Magical Steps
- Prep Time: 5 mins
- Cook Time: 5 mins
- Total Time: 40 mins
- Yield: 1 cup 1x
- Category: Condiment
- Method: Pickling
- Cuisine: International
- Diet: Vegan
Description
Quick-pickled red onions add a tangy crunch to salads, tacos, and sandwiches. They’re easy to make and ready in minutes.
Ingredients
- 1 medium red onion, thinly sliced
- 1/2 cup white vinegar
- 1/2 cup water
- 1 tablespoon sugar
- 1 teaspoon salt
Instructions
- Slice the red onion thinly and place it in a jar.
- Heat vinegar, water, sugar, and salt in a saucepan until the sugar dissolves.
- Pour the hot liquid over the onions in the jar.
- Let cool to room temperature, then cover and refrigerate for at least 30 minutes before serving.
Notes
- Store in the fridge for up to 2 weeks.
- Use on tacos, salads, or sandwiches for extra flavor.
Nutrition
- Serving Size: 2 tbsp
- Calories: 10
- Sugar: 1g
- Sodium: 120mg
- Fat: 0g
- Saturated Fat: 0g
- Unsaturated Fat: 0g
- Trans Fat: 0g
- Carbohydrates: 2g
- Fiber: 0g
- Protein: 0g
- Cholesterol: 0mg
Keywords: quick pickled onions, red onion pickles, easy pickled onions