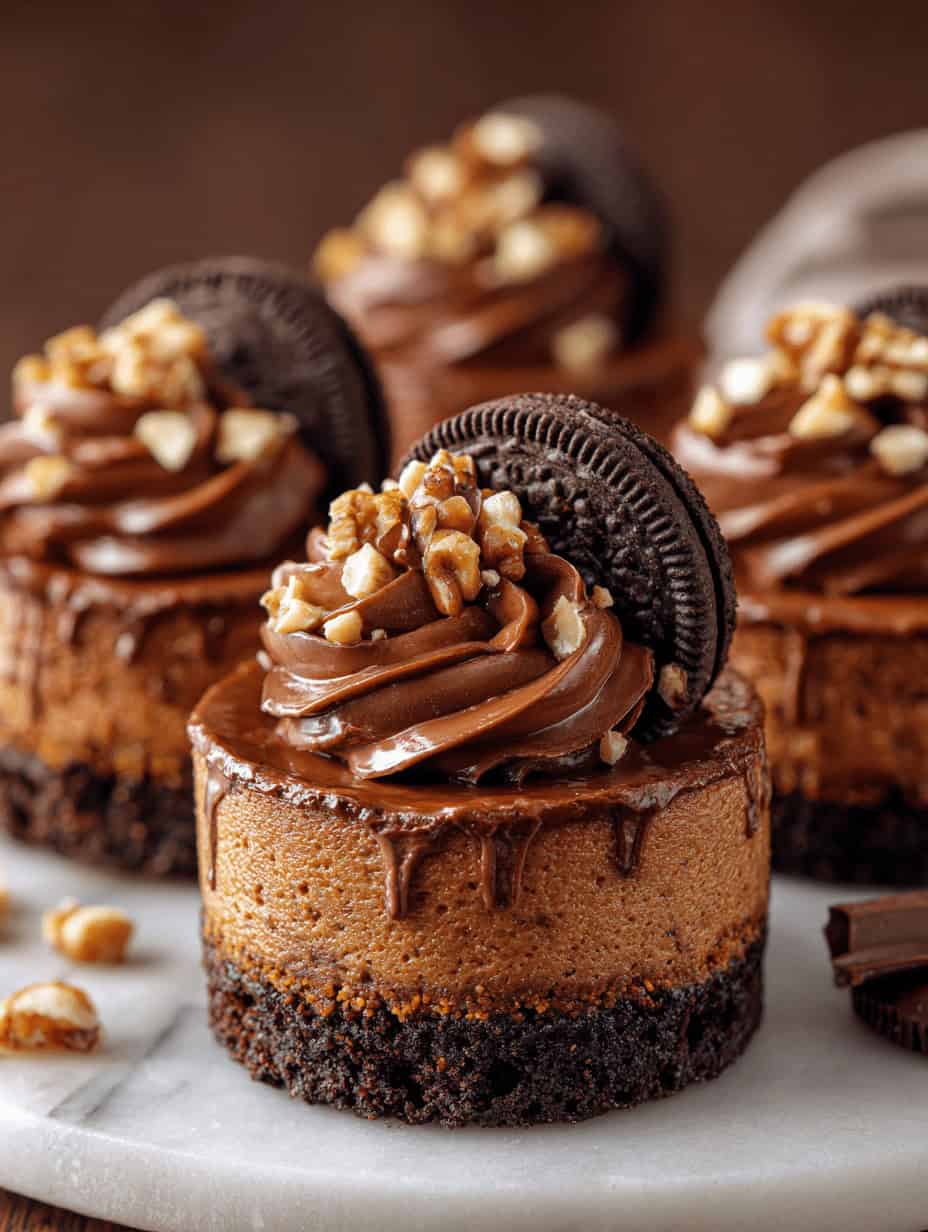
These decadent Nutella Cheesecake Cupcakes combine the rich, creamy texture of classic cheesecake with the irresistible chocolate-hazelnut flavor of Nutella, all nestled on a crunchy chocolate cookie crust. Perfect for special occasions or when you want to impress your guests with an elegant dessert that’s surprisingly easy to make.
Why You’ll Love This Recipe
These Nutella Cheesecake Cupcakes offer the perfect balance of indulgence and convenience. Unlike traditional cheesecake that requires a springform pan and careful water bath baking, these individual portions bake beautifully in a standard muffin tin. The chocolate sandwich cookie base provides a delightful crunch that contrasts beautifully with the silky smooth cheesecake filling. The Nutella adds a sophisticated chocolate-hazelnut flavor that elevates these cupcakes beyond ordinary desserts. They’re also incredibly versatile – perfect for dinner parties, birthday celebrations, or any time you want to treat yourself to something special. Plus, the individual serving sizes make portion control easier and presentation more elegant.
Ingredients You’ll Need
For the Cupcakes:
- 12 chocolate sandwich cookies (like Oreos)
For the Cheesecake Filling:
- 2 (8 oz) packages cream cheese, softened
- 1/2 cup granulated sugar
- 2 large eggs
- 1/3 cup sour cream
- 1/2 teaspoon vanilla extract
- 1/2 cup Nutella
- Pinch of salt
For Garnish:
- Whipped cream
- Chopped hazelnuts
- Extra Nutella for topping
How to Make Nutella Cheesecake Cupcakes
Step-by-Step Instructions:
Step 1: Prepare Your Pan Preheat your oven to 325°F (163°C). Line a 12-cup muffin tin with paper liners or lightly grease each cup with butter or cooking spray.
Step 2: Create the Cookie Base Place one chocolate sandwich cookie in the bottom of each muffin cup. Press down gently to ensure the cookie sits flat against the bottom. This will serve as your crust and provide a delicious foundation for the cheesecake filling.
Step 3: Prepare the Cream Cheese In a large mixing bowl, beat the softened cream cheese with an electric mixer on medium speed until completely smooth and creamy, about 2-3 minutes. Make sure there are no lumps remaining, as these will affect the final texture of your cupcakes.
Step 4: Add Sugar and Mix Gradually add the granulated sugar to the cream cheese, beating until well combined and fluffy, approximately 2 minutes. The mixture should be light and airy.
Step 5: Incorporate Eggs Add the eggs one at a time, beating well after each addition. This ensures proper incorporation and helps create a smooth, even texture. Beat on low speed to avoid incorporating too much air, which can cause cracking.
Step 6: Blend in Remaining Ingredients Add the sour cream, vanilla extract, Nutella, and salt to the mixture. Beat on low speed until just combined. The Nutella should be fully incorporated, creating a beautiful tan-colored filling with rich chocolate-hazelnut flavor.
Step 7: Fill the Muffin Cups Divide the cheesecake filling evenly among the prepared muffin cups, filling each about 3/4 full. The filling should sit nicely on top of the cookie base without overflowing.
Step 8: Bake to Perfection Bake for 18-22 minutes, or until the centers are almost set but still slightly jiggly when gently shaken. The tops should not be browned. Avoid overbaking, as this can cause the cheesecakes to crack or become dense.
Step 9: Cool Completely Remove from the oven and let cool in the pan for 30 minutes at room temperature. Then refrigerate for at least 2 hours or overnight until completely chilled and set.
Step 10: Add Garnishes Before serving, top each cupcake with a dollop of whipped cream, a sprinkle of chopped hazelnuts, and a drizzle of extra Nutella for an elegant presentation.
Helpful Tips
Ensure your cream cheese is properly softened before beginning. Take it out of the refrigerator at least 2 hours before baking, or microwave it in 10-second intervals until soft to the touch. This prevents lumps in your filling.
Room temperature eggs blend more easily into the mixture. If you forget to take them out early, place them in a bowl of warm water for 5-10 minutes to bring them to room temperature quickly.
Don’t overmix the batter once you add the eggs. Overmixing can incorporate too much air, leading to cracks on the surface as the cupcakes cool.
For the smoothest filling, strain the mixture through a fine-mesh sieve before filling the muffin cups. This removes any remaining lumps and ensures a silky texture.
If you notice small cracks forming on top during baking, don’t worry. These will be covered by your garnishes and won’t affect the taste.
Details
Prep Time: 15 minutes
Cook Time: 20 minutes
Chill Time: 2 hours
Total Time: 2 hours 35 minutes
Servings: 12 cupcakes
Difficulty: Easy to Moderate
The beauty of this Nutella Cheesecake Cupcakes recipe lies in its simplicity and foolproof method. Unlike traditional cheesecake that requires careful temperature monitoring and water baths, these individual portions are much more forgiving. The chocolate cookie base eliminates the need for a separate crust preparation, while the Nutella adds incredible flavor without requiring tempering or special techniques.
Notes
For best results, use full-fat cream cheese rather than reduced-fat versions, as the higher fat content creates a richer, creamier texture. If your Nutella is particularly thick, you can warm it slightly in the microwave for 15-20 seconds to make it easier to incorporate.
These cupcakes can be made up to 3 days in advance, making them perfect for entertaining. The flavors actually improve after a day in the refrigerator as they have time to meld together.
For a more intense chocolate flavor, try using chocolate graham crackers or chocolate wafer cookies instead of sandwich cookies for the base. You can also experiment with different Nutella alternatives or add a tablespoon of cocoa powder to the filling for deeper chocolate notes.
Frequently Asked Questions
Can I use low-fat cream cheese? While you can substitute low-fat cream cheese, the texture will be less rich and creamy. Full-fat cream cheese provides the best results for this recipe.
Can I make these without eggs? Eggs are essential for the structure and texture of cheesecake. There are vegan substitutes available, but they will significantly change the final result.
Why did my cupcakes crack? Cracking usually occurs from overbaking or sudden temperature changes. Ensure your oven temperature is accurate and avoid opening the oven door during baking.
Can I freeze these cupcakes? Yes, these freeze well for up to 2 months. Wrap individually in plastic wrap, then place in a freezer-safe container. Thaw in the refrigerator overnight before serving.
How do I know when they’re done? The centers should be almost set but still slightly jiggly when gently shaken. They’ll continue to set as they cool.
Storage Instructions
Store your Nutella Cheesecake Cupcakes covered in the refrigerator for up to 5 days. The cheesecake filling needs to stay chilled to maintain its texture and food safety. If you’ve added the whipped cream garnish, consume within 2-3 days for best quality.
For longer storage, these cupcakes freeze exceptionally well. Wrap each cupcake individually in plastic wrap, then place in an airtight container or freezer bag. They’ll maintain their quality for up to 2 months in the freezer. When ready to serve, thaw them in the refrigerator overnight. Add fresh garnishes after thawing for the best presentation.
If transporting these cupcakes, keep them chilled in a cooler with ice packs, especially in warm weather. The cream cheese filling can soften and lose its shape if left at room temperature for extended periods.
Conclusion
This Nutella Cheesecake Cupcakes recipe transforms the classic dessert into an elegant, individual treat that’s perfect for any occasion. The combination of creamy cheesecake, rich Nutella flavor, and crunchy chocolate cookie base creates a dessert that’s both sophisticated and comforting. Whether you’re hosting a dinner party, celebrating a special occasion, or simply treating yourself to something delicious, these cupcakes deliver restaurant-quality results with home kitchen simplicity.
The beauty of this recipe lies not only in its incredible taste but also in its make-ahead convenience and impressive presentation. Each bite offers the perfect balance of textures and flavors that will have your guests asking for the recipe. With proper storage, you can enjoy these decadent treats for days, making them an ideal choice for busy bakers who want to create something special without the stress of last-minute preparation.