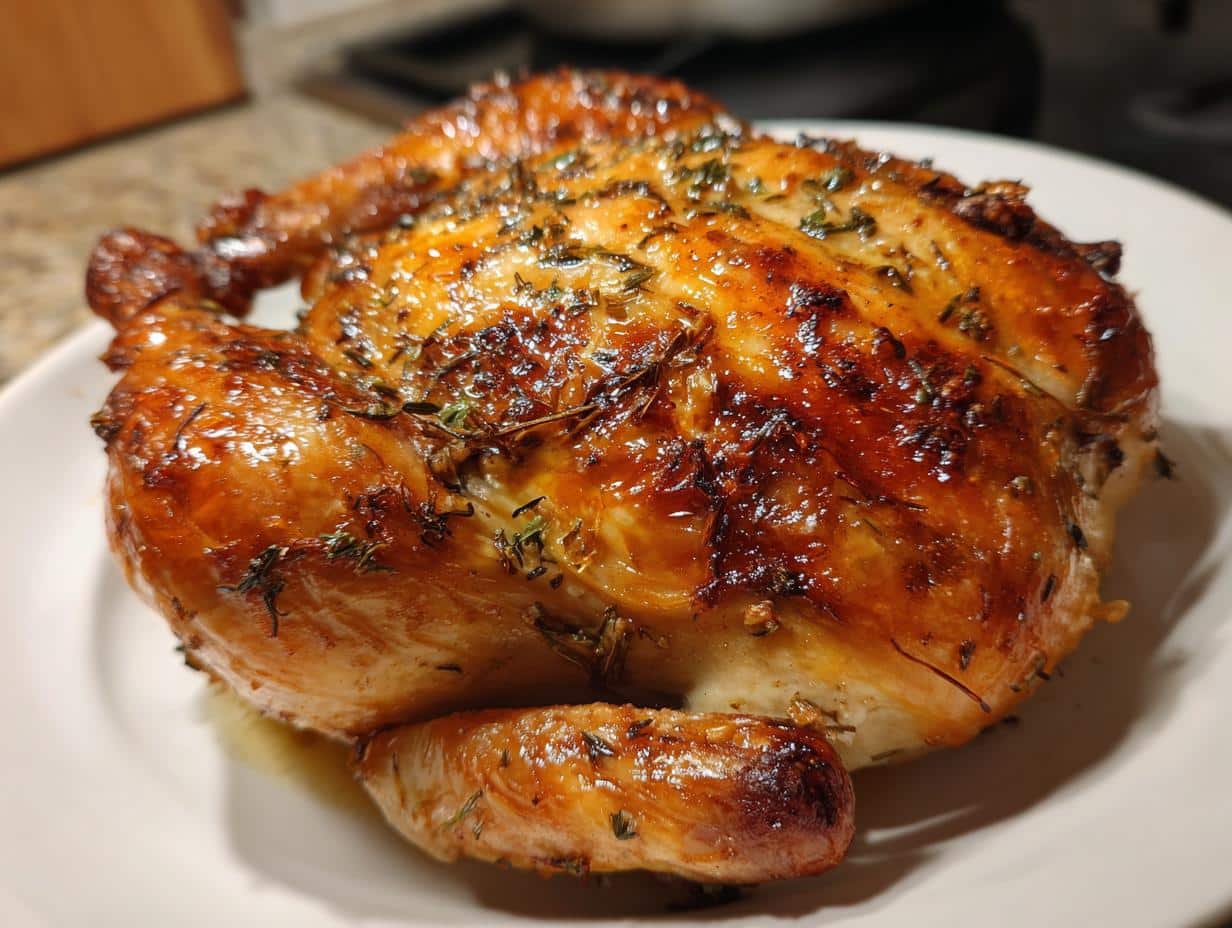
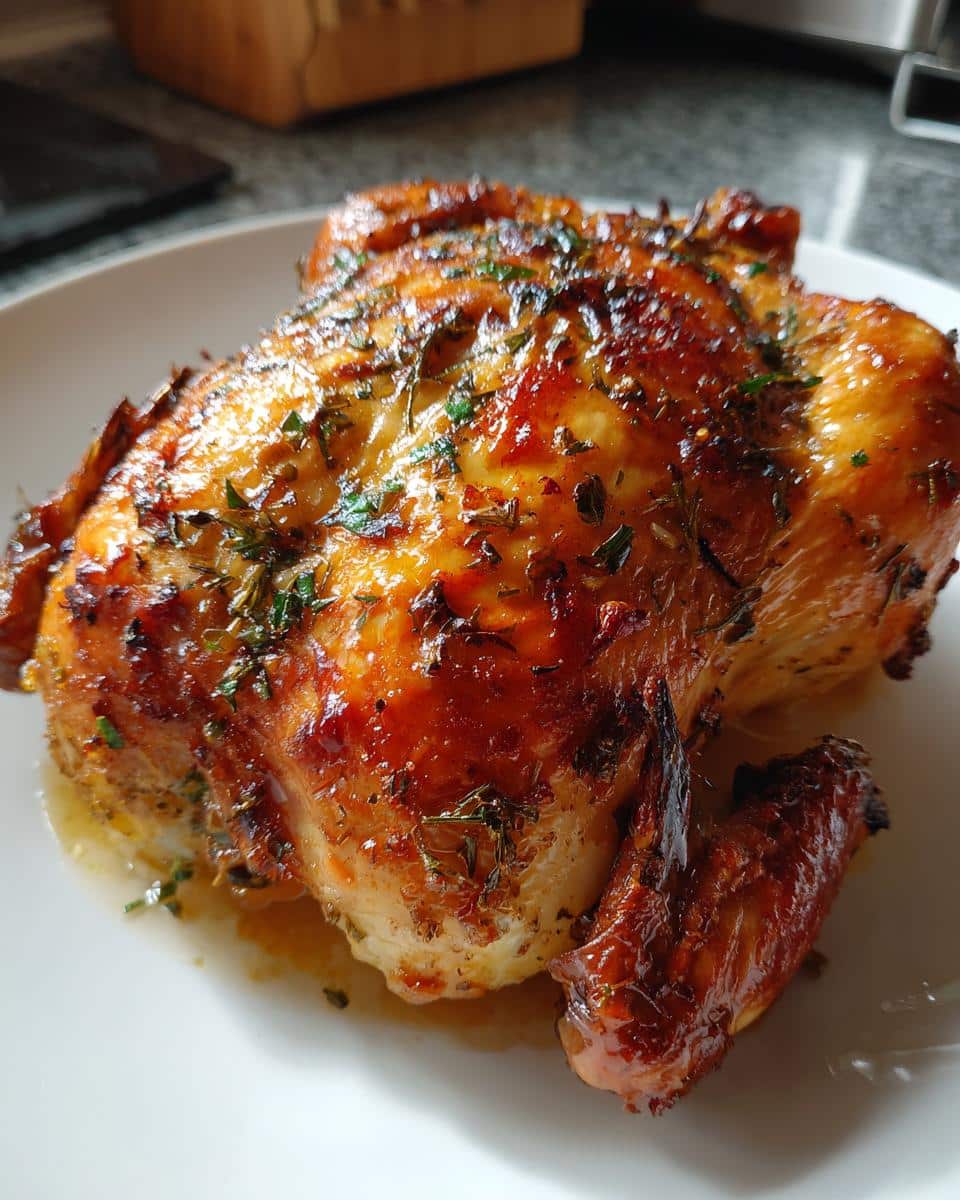
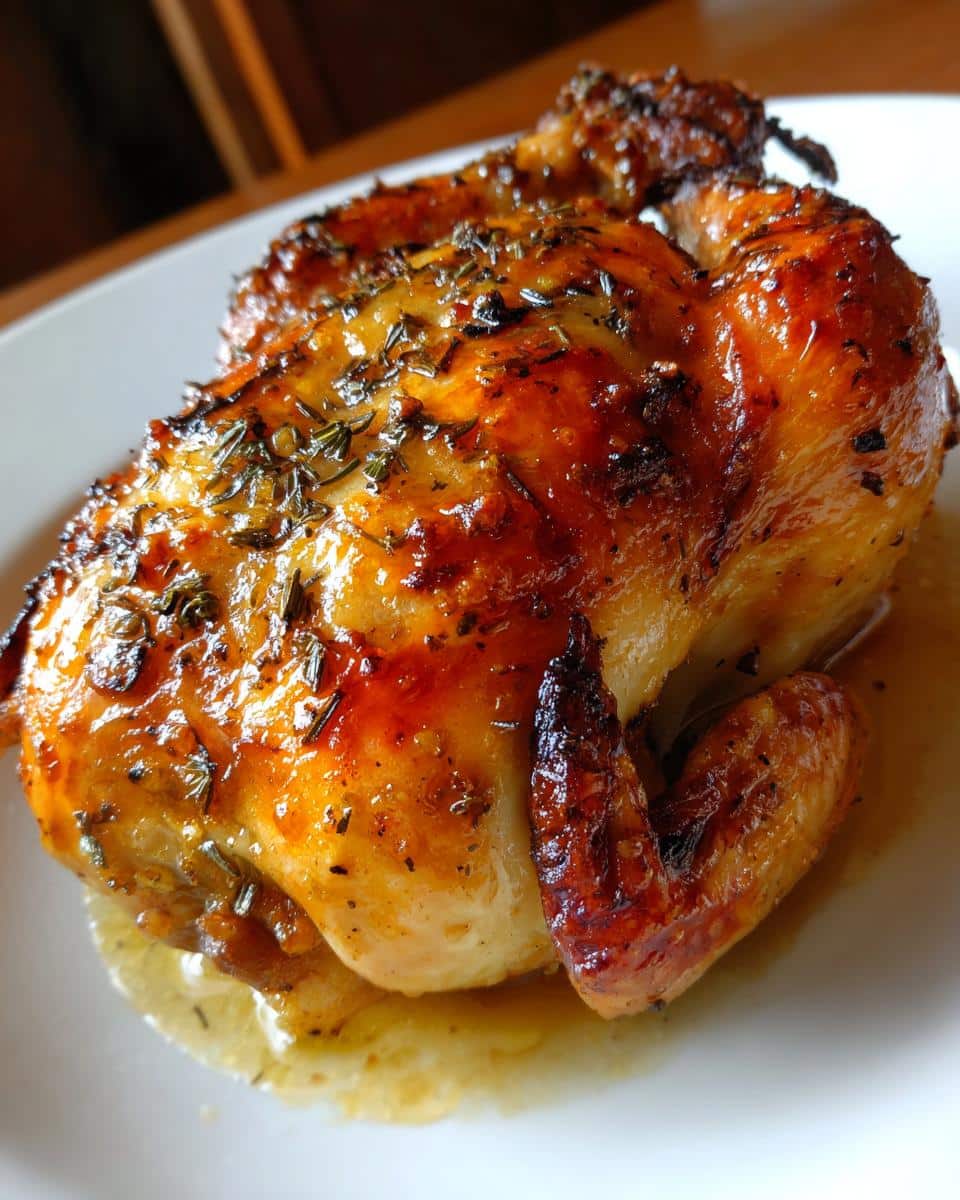
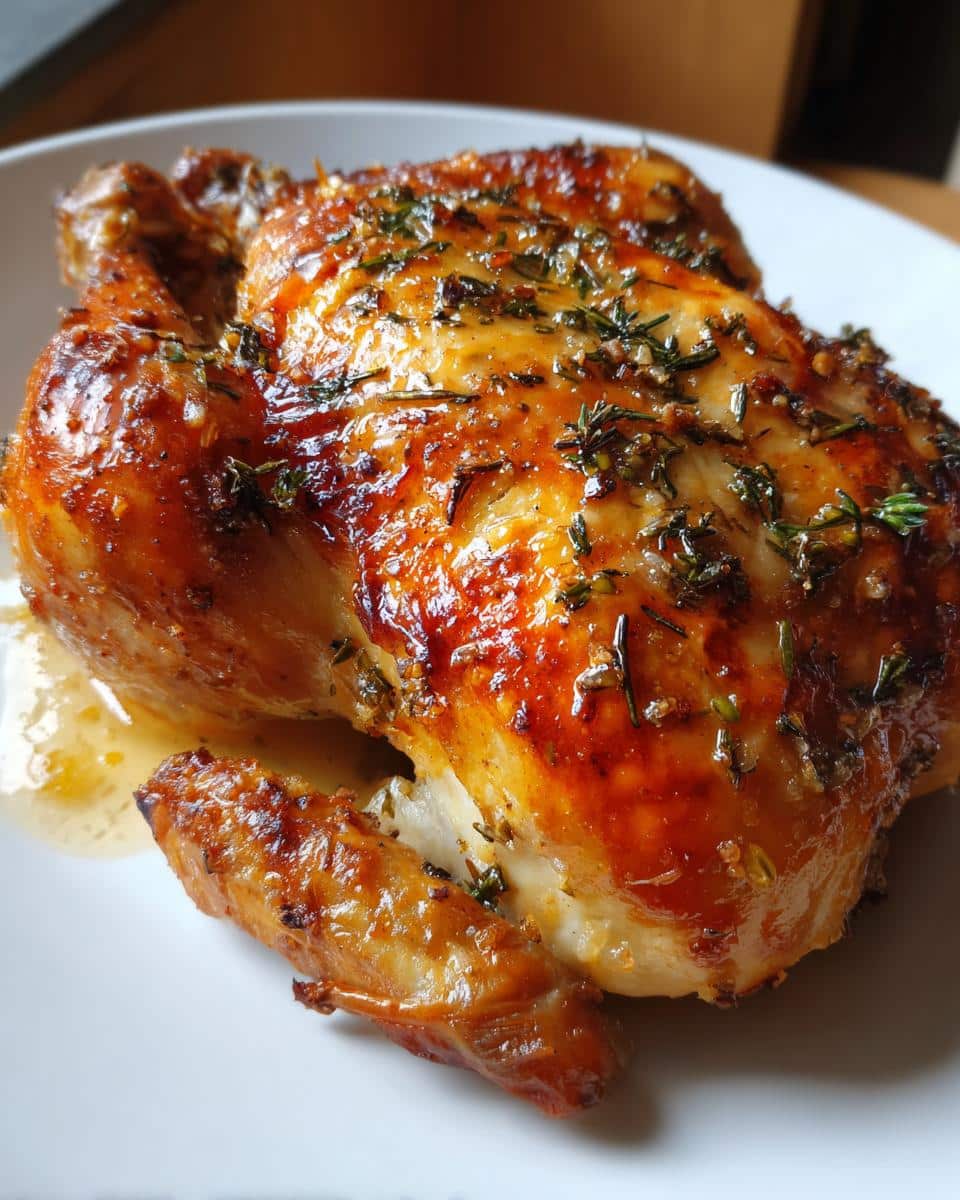
Oh, the magic of a perfectly roasted chicken! There’s nothing quite like pulling a golden, juicy bird from the oven – the aroma filling your kitchen, the skin crackling as it cools. My Sunday roast chicken became legendary among friends after one fateful dinner party where three people asked for seconds (and one shamelessly licked the roasting pan). What makes it special? Just a handful of simple ingredients transformed by time and heat into something extraordinary. This recipe proves you don’t need fancy techniques for five-star flavor. That first crispy-skinned bite takes me back to childhood dinners at my grandma’s worn oak table every time.
Why You’ll Love This Roast Chicken
Trust me, this roast chicken will become your new go-to for three simple reasons:
- Juicy perfection every time: That lemon and garlic stuffed inside keeps the meat unbelievably moist (no dry chicken here!)
- Crispy, golden skin: The paprika and olive oil create a crackly crust you’ll want to fight over
- Effortless elegance: From weeknight dinner to fancy gatherings, this roast chicken adapts beautifully
Even my 12-year-old niece can make this – it’s that foolproof. The hardest part? Waiting those agonizing 10 minutes while it rests!
Roast Chicken Ingredients
Gather these simple ingredients – I promise you probably have most already:
- 1 whole chicken (4-5 lbs, patted very dry)
- 2 tbsp olive oil (the good stuff!)
- 1 tsp salt (I use kosher)
- 1 tsp black pepper (freshly ground if you can)
- 1 tsp garlic powder
- 1 tsp paprika (smoked adds a nice twist)
- 1 lemon, halved (give it a good roll first)
- 4 cloves garlic, crushed (no need to chop)
- 2 sprigs fresh rosemary
Ingredient Notes & Substitutions
Life happens – here’s how to adapt when your fridge rebels:
No fresh rosemary? Use 1 tsp dried (but fresh really makes a difference). Out of lemons? Try half an onion or orange instead – still adds moisture and flavor. Prefer butter? Go for it! Just soften it first so it spreads easily under the skin.
Now listen close – that “pat dry” step isn’t optional! Skipping it means sad, soggy skin. I use paper towels and press firmly – you’ll be shocked how much moisture comes off. This is the secret weapon for that irresistible crispy golden crust everyone fights over.
Equipment Needed for Roast Chicken
You don’t need fancy gadgets to make incredible roast chicken – just these basics I bet you already own:
- Roasting pan: Any sturdy pan with 2-inch sides works (I’ve even used my trusty cast iron skillet in a pinch)
- Meat thermometer: Non-negotiable! That little gadget saves you from dry or undercooked chicken every time
- Paper towels: For that all-important pat-down (I go through half a roll because crispy skin is life)
- Basting brush: Silicone or old-school doesn’t matter – just something to spread those glorious pan juices
See? Nothing crazy – just practical tools that help turn a simple chicken into something extraordinary. Now let’s get roasting!
How to Make Perfect Roast Chicken
Alright, let’s turn that raw chicken into the star of your dinner table! Follow these simple steps and you’ll have a roast chicken that’ll make you feel like a kitchen rockstar.
Prep the Chicken
First things first – preheat that oven to 375°F (190°C). While it’s heating up, grab your chicken and give it a good pat-down with paper towels. I’m talking serious pressure here – get every last bit of moisture off that skin! This is your golden ticket (literally) to crispy perfection.
Next, rub that bird all over with olive oil like you’re giving it a spa treatment. Get under the wings, between the legs – everywhere! Now for the fun part: sprinkle your salt, pepper, garlic powder and paprika all over. Pro tip: gently lift the breast skin and rub some seasoning directly on the meat too – flavor bombs waiting to happen!
Finally, stuff the cavity with your lemon halves (give ’em a good squeeze first), crushed garlic cloves, and rosemary sprigs. The steam from these will keep your roast chicken incredibly juicy from the inside out.
Roast the Chicken
Pop your prepared chicken on the middle oven rack – this ensures even cooking. Set your timer for 45 minutes and resist the urge to peek! At the halfway mark, carefully open the oven and baste that beauty with its own delicious juices. The sizzle sound? That’s the sound of success.
After about 1 hour 30 minutes total (for a 4-5 lb bird), it’s thermometer time. Insert it into the thickest part of the thigh without touching bone – you want 165°F (74°C). If it’s not there yet, give it 5-10 minute increments. No guesswork allowed – that thermometer is your best friend for perfect roast chicken!
Rest and Carve
Here comes the hardest part: patience. Transfer your gorgeous roast chicken to a cutting board and walk away for 10 minutes. I know, I know – but this rest time lets the juices redistribute so every bite is moist.
When it’s finally time, carve against the grain for tender slices. Start by removing the legs and wings, then slice the breast meat diagonally. Pro move: save those pan drippings for gravy or drizzle them right over the carved meat. Now grab that crispy skin you worked so hard for – you’ve earned it!
Roast Chicken Tips for Success
After making this roast chicken more times than I can count, I’ve picked up some game-changing tricks that’ll take yours from good to “can I have your recipe?” levels:
- Truss like a pro: Tying the legs together with kitchen twine keeps everything compact for even cooking. No twine? Just tuck the wing tips under – works almost as well!
- Pan drippings gold: Those glorious juices at the bottom? Spoon them over the carved meat or whisk with a bit of flour for instant gravy. Waste not, want not!
- Rack position matters: Middle rack is ideal, but if your chicken browns too fast, move it down one level. Every oven has hot spots – get to know yours.
- Crispier skin hack: For extra crackle, blast the heat to 425°F for the last 5-10 minutes. Watch closely though – it goes from golden to burnt fast!
- Herb upgrade: Slide sprigs of thyme or sage under the skin before roasting. The flavor infusion will blow your mind.
Oh! One last thing – always let your roast chicken come to room temp for 30 minutes before cooking. Cold meat straight from the fridge cooks unevenly. Trust me on this one!
Roast Chicken Variations That’ll Keep Things Exciting
Once you’ve mastered the basic roast chicken, the fun really begins! Here are my favorite ways to mix things up when I’m craving something different (or just need to use up what’s in my fridge):
Herb Explosion Version
Swap the rosemary for thyme and sage – it’s like walking through an Italian garden! I stuff extra sprigs under the skin too. The aroma? Absolutely intoxicating. My neighbor once knocked on my door asking what smelled so good when I made this version.
One-Pan Wonder
Toss chopped potatoes, carrots, and onions around the chicken in the pan. They soak up all those glorious juices while roasting. Just cut them small enough to cook through – nobody wants crunchy potatoes! This is my lazy Sunday supper go-to.
Spice Rub Adventures
Feeling bold? Try these seasoning combos instead of the basic mix:
- Smoky BBQ: Brown sugar, smoked paprika, garlic powder, and a pinch of cayenne
- Greek-Inspired: Lemon zest, oregano, garlic, and a sprinkle of feta after roasting
- Indian-Spiced: Garam masala, turmeric, and a dollop of yogurt under the skin
My husband goes wild for the BBQ version – says it reminds him of summer cookouts!
Citrus Twists
Instead of lemon, try orange or lime halves in the cavity. The citrus oils perfume the meat beautifully. For extra zing, I sometimes add thin slices under the skin before roasting. Just be careful not to overdo it – you want subtle flavor, not puckering tartness!
The best part? These roast chicken variations all start with the same simple technique. Once you’ve got that down, the flavor possibilities are endless. What crazy combinations have you tried? I’m always looking for new ideas to test out!
Serving Suggestions That’ll Make Your Roast Chicken Shine
Now that you’ve got this gorgeous roast chicken ready, let’s talk about how to make it the star of your table! Here’s how I love to serve mine – these pairings turn a simple meal into something special:
Classic Comfort Pairings
You can’t go wrong with these timeless combos:
- Creamy mashed potatoes: That golden chicken skin perched atop buttery potatoes? Pure heaven. Pro tip: use some of the pan drippings in your mash!
- Roasted vegetables: Carrots, Brussels sprouts, or asparagus roasted alongside the chicken soak up all those delicious flavors
- Crusty bread: For mopping up every last bit of juice (my husband calls this “the best part”)
Lighter Options
When I want something fresher:
- Bright green salad: The crisp greens cut through the richness perfectly – try a lemony vinaigrette
- Steamed green beans: Tossed with a bit of garlic and those pan juices
- Herbed rice: The subtle flavors won’t compete with your masterpiece chicken
Presentation Perfection
Here’s how I make my roast chicken look as good as it tastes:
- Carve at the table: There’s something magical about slicing into that golden bird right in front of guests
- Garnish simply: A few fresh rosemary sprigs and lemon wedges make it restaurant-worthy
- Serve on a platter: Arrange the carved meat over a bed of your sides – it makes everything look abundant
My favorite move? Pouring those collected pan juices into a little pitcher for drizzling at the table. It’s these little touches that turn Tuesday dinner into something memorable. What are your go-to roast chicken pairings? I’m always hunting for new inspiration!
Storing and Reheating Roast Chicken
Let’s be real – leftovers are half the joy of roast chicken! But only if you store them right. Here’s how I keep mine tasting almost-as-good-as-fresh for days:
Smart Storage Tips
First rule: don’t leave that bird sitting out! Get it in the fridge within 2 hours of cooking (1 hour if your kitchen’s hot). I learned this the hard way after one unfortunate food poisoning incident – never again!
For maximum freshness:
- Carve before storing: Whole chickens take forever to cool properly. I slice all the meat off and stash it in shallow containers.
- Keep the juices: Pour any pan drippings over the meat before refrigerating – it’s like a built-in moisture shield!
- Label with dates: Trust me, after three days even the best roast chicken starts to lose its magic.
Reheating Without the Dryness
The microwave is your roast chicken’s worst enemy! Here’s how I bring leftovers back to life:
- Oven method: Place chicken in a baking dish with a splash of chicken broth or water. Cover with foil and heat at 325°F for 15-20 minutes until warmed through.
- Skillet revival: For smaller portions, I warm slices in a pan with a pat of butter over medium-low heat. Flip frequently!
- Soup salvation: If it’s already dried out, chop it up and toss it into chicken noodle soup – instant flavor booster!
Pro tip: The skin won’t stay crispy no matter what you do, so I usually remove it before storing. But those juicy bits underneath? Absolute gold for sandwiches, salads, or late-night fridge raids!
Roast Chicken Nutrition
Let’s talk about what’s really in this glorious roast chicken! Now, I’m no dietitian, but I can tell you this – when made with quality ingredients, it’s surprisingly wholesome comfort food. Here’s the scoop on what you’re getting per serving (about 1/6 of a 4-5 lb chicken):
- Calories: Around 320 (perfect for a satisfying meal)
- Protein: A whopping 35g (hello, muscle fuel!)
- Fat: 18g (mostly the good unsaturated kind from olive oil)
- Carbs: Just 2g (mostly from those lemon halves)
- Sodium: 450mg (easily adjusted if you’re watching salt)
Important note: These numbers can vary based on your specific ingredients. Used butter instead of oil? Added extra seasonings? Your roast chicken might differ slightly. But one thing stays constant – it’s packed with high-quality protein and way fewer processed additives than store-bought rotisserie chickens!
The skin (my favorite part!) accounts for most of the fat content, so you can always remove it if you’re being extra careful. But personally? I say life’s too short not to enjoy that crispy golden goodness in moderation!
Roast Chicken FAQs
Over the years, I’ve been asked every possible question about roast chicken – here are the ones that come up most often (along with my tried-and-true answers):
Can I use frozen chicken?
You can, but please – thaw it first! I learned this lesson the hard way when I tried roasting a partially frozen bird. The outside burned while the inside stayed icy. Not cute. Thaw it safely in the fridge overnight, or if you’re in a pinch, submerge it in cold water (in its packaging) for a few hours, changing the water every 30 minutes.
How do I get the crispiest skin possible?
Oh honey, you’re speaking my language! My two golden rules:
- Pat that skin bone-dry with paper towels (I go through half a roll!)
- Finish with high heat – crank your oven to 425°F for the last 10 minutes
Bonus trick: rub a tiny bit of baking powder into the skin before roasting. It works miracles for extra crispiness!
What’s the best thermometer to use?
After years of testing, I swear by instant-read thermometers. They give you a precise reading in seconds – no guesswork! The ThermoPop is my ride-or-die (about $35 and worth every penny). Whatever you choose, make sure it’s calibrated properly – boil some water to test if it reads 212°F. A faulty thermometer is worse than no thermometer at all!
Why does my chicken dry out?
Three likely culprits:
- Overcooking: That’s why the thermometer is non-negotiable – pull at 165°F!
- Skipping the rest: Those 10 minutes aren’t optional – they let juices redistribute
- Not enough fat: Don’t skimp on the oil/butter rub – it’s what keeps things moist
Follow my recipe to the letter and you’ll have juicy chicken every time!
Can I make this ahead?
Sort of! You can prep the chicken (season it, stuff it) up to 24 hours ahead and keep it covered in the fridge. But roast it right before serving – reheated roast chicken never quite hits the same. That said, leftovers make killer chicken salad the next day!
Got a roast chicken question I didn’t cover? Drop it in the comments – I’ve probably tested every variation under the sun and love helping fellow chicken enthusiasts!
Final Thoughts
There you have it – everything I’ve learned about making the perfect roast chicken after years of practice (and happy accidents!). I still get giddy every time I pull that golden beauty from the oven – it’s like a little victory dance in my kitchen.
I’d love to hear how your roast chicken turns out! Did you stick with the classic version or try one of the fun variations? And most importantly – what’s your go-to side dish pairing? My readers always give me the best new ideas in the comments (last month someone suggested roasted radishes that changed my life!).
If this recipe brings as much joy to your table as it has to mine, consider leaving a quick rating – it helps other home cooks discover the magic of simple, perfect roast chicken. Now go forth and roast! That crispy skin isn’t going to eat itself.

Juicy Roast Chicken Recipe with Crispy Golden Skin
- Prep Time: 15 minutes
- Cook Time: 1 hour 30 minutes
- Total Time: 1 hour 45 minutes
- Yield: 4-6 servings 1x
- Category: Main Dish
- Method: Roasting
- Cuisine: American
- Diet: Low Lactose
Description
A simple and delicious roast chicken recipe perfect for any occasion.
Ingredients
- 1 whole chicken (about 4–5 lbs)
- 2 tbsp olive oil
- 1 tsp salt
- 1 tsp black pepper
- 1 tsp garlic powder
- 1 tsp paprika
- 1 lemon, halved
- 4 cloves garlic, crushed
- 2 sprigs fresh rosemary
Instructions
- Preheat your oven to 375°F (190°C).
- Pat the chicken dry with paper towels.
- Rub the chicken with olive oil.
- Season with salt, pepper, garlic powder, and paprika.
- Stuff the cavity with lemon halves, garlic, and rosemary.
- Place the chicken in a roasting pan.
- Roast for 1 hour 30 minutes or until the internal temperature reaches 165°F (74°C).
- Let rest for 10 minutes before carving.
Notes
- Use a meat thermometer for accurate doneness.
- Adjust seasoning to your taste.
- Baste the chicken with pan juices halfway through cooking.
Nutrition
- Serving Size: 1/6 of chicken
- Calories: 320
- Sugar: 1g
- Sodium: 450mg
- Fat: 18g
- Saturated Fat: 5g
- Unsaturated Fat: 11g
- Trans Fat: 0g
- Carbohydrates: 2g
- Fiber: 0g
- Protein: 35g
- Cholesterol: 120mg
Keywords: roast chicken, easy dinner, baked chicken