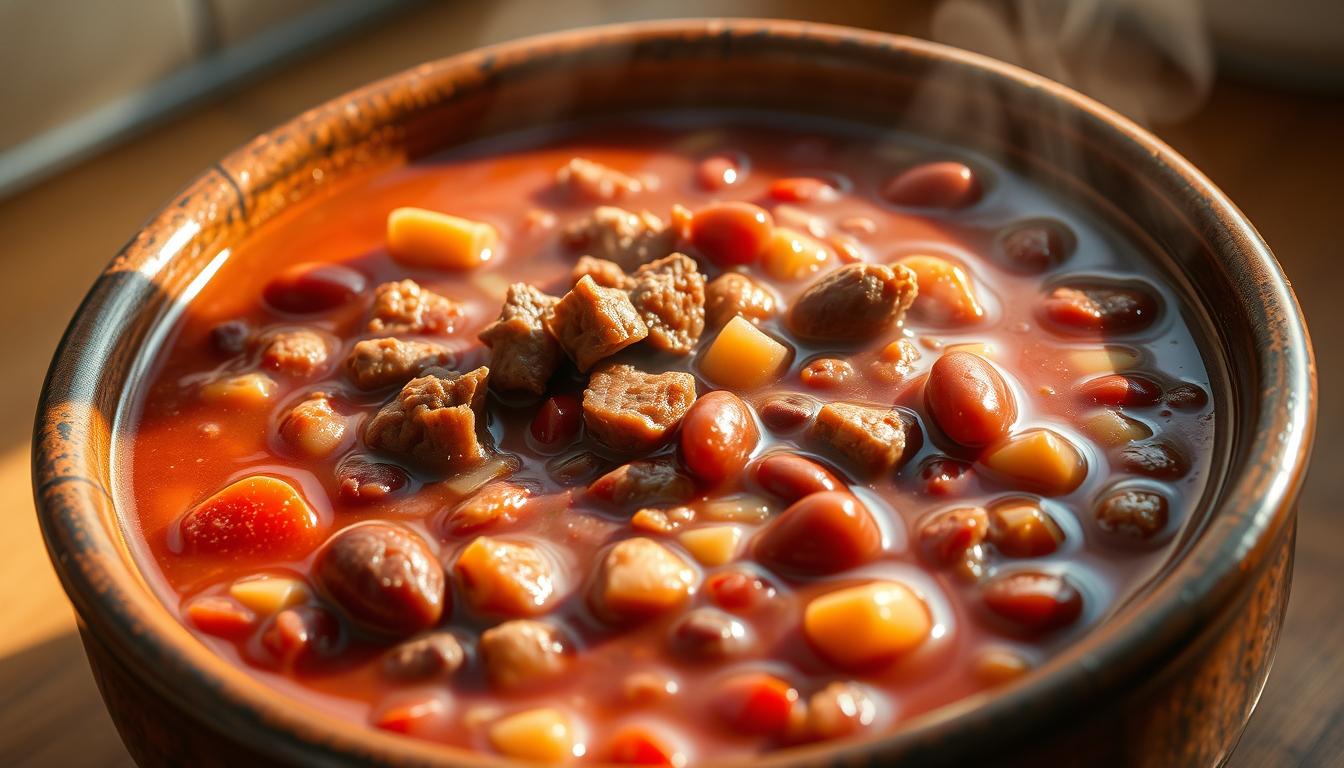
Every time I walk into a Wendy’s, the smell of their chili grabs my attention. Growing up, it was more than just a meal. It was a comfort that brought warmth and memories of family dinners. Now, I’m excited to share how you can make this iconic Wendy’s chili at home.
Wendy’s chili has been loved for decades. It’s known for its rich flavor and special mix of ingredients. This recipe isn’t just about mixing ingredients. It’s about capturing a tradition that has delighted millions.
If you’re a home cook wanting to impress your family or a Wendy’s chili fan wanting to master the recipe, this guide is for you. It will take you through every step to create a chili that rivals the restaurant’s version.
Key Takeaways
- Learn the authentic Wendy’s chili recipe techniques
- Discover the secret to perfectly browning ground beef
- Master the three-bean combination
- Understand the importance of simmering time
- Create a restaurant-quality chili at home
The History Behind Wendy’s Chili

Wendy’s menu is famous for its chili, a true culinary gem. It was born in 1969 in Columbus, Ohio. This dish has a story that goes beyond just food.
Wendy’s chili started as a way to use leftover hamburger patties. Dave Thomas, the founder, turned these leftovers into a tasty chili. It quickly became a favorite on the menu.
- First introduced in 1969
- Originally priced at 55 cents
- Created as a food recovery strategy
The chili’s flavor comes from Wendy’s use of fresh, never frozen beef. It’s a hit with customers, offering 23 grams of protein and only 250 calories in a large serving.
| Chili Nutritional Highlights | Value |
|---|---|
| Protein | 23 grams |
| Fiber | 5 grams |
| Calories | 250 |
Wendy’s chili has become a comfort food for millions in the U.S. Today, over 6,500 outlets serve it. It’s a symbol of innovative fast food.
Essential Ingredients for Authentic Wendy’s Chili
Creating the perfect bean chili starts with the right ingredients. You’ll need a mix of proteins, beans, and seasonings to make it just like Wendy’s. This combination brings your homemade chili to life.

Making authentic chili takes precision and passion. Let’s look at the key parts that make a great chili.
Premium Ground Beef Selection
The base of any good chili is quality ground beef. For your chili, choose:
- 2 pounds of lean ground beef
- 80/20 meat-to-fat ratio for the best flavor
- Fresh, never frozen beef
Three-Bean Medley Components
A true Wendy’s-style chili needs a special bean mix:
- Kidney Beans: 15.5 oz can – adds a rich texture
- Pinto Beans: 16 oz can – gives a creamy feel
- Great Northern Beans: adds more protein and texture
Fresh Vegetables and Aromatics
Vegetables add depth and complexity to your chili:
- Diced onions
- Minced garlic
- Diced green peppers
Signature Spice Blend
The secret to a great chili is its spice mix. Your blend should include:
- Chili powder
- Cumin
- Paprika
- 2 chili seasoning packets (1.25 oz each)
With these ingredients, you’re set to make a chili that’s as good as Wendy’s.
Kitchen Equipment You’ll Need
To make a tasty Wendy’s-style chili, you need more than just good ingredients. The right kitchen tools make cooking easier and more fun. Let’s look at the key equipment for making a chili that tastes just like Wendy’s.

Choosing the right pot is key to making great chili. A large Dutch oven or heavy-bottomed pot is best. It ensures even heat and prevents burning. This helps you get that deep, slow-cooked flavor that Wendy’s is famous for.
Essential Cooking Tools
- Large Dutch oven or heavy-bottomed pot
- Sharp chef’s knife for chopping vegetables
- Cutting board
- Wooden spoon or silicone spatula
- Measuring cups and spoons
- Colander for draining beans
Optional but Helpful Equipment
- Slow cooker (alternative cooking method)
- Kitchen scale for precise ingredient measurements
- Meat thermometer
Invest in quality tools to make cooking easier. A good Dutch oven can turn your chili into a restaurant-quality dish.
| Equipment | Purpose in Chili Recipe | Recommended Type |
|---|---|---|
| Dutch Oven | Even heat distribution | Cast iron or enameled cast iron |
| Chef’s Knife | Vegetable preparation | 8-inch stainless steel |
| Measuring Cups | Precise ingredient quantities | Stainless steel with clear markings |
With these tools, you’re all set to make a chili that will wow your family and friends. Remember, the right tools are the start of great cooking!
Preparing Your Vegetables and Beans
Making a hearty chili needs careful prep of veggies and beans. The right steps can make your dish stand out. With smart chopping and bean handling, your chili will taste like it’s from a restaurant.
Precise Vegetable Cutting Techniques
Even cuts mean even cooking and texture in your chili. Here’s how to do it right:
- Dice onions into consistent 1/4-inch pieces
- Chop celery in thin, uniform slices
- Cut bell peppers into small, equal cubes
- Use a sharp knife for clean, precise cuts
Bean Preparation Strategies
Beans are key for a real hearty chili. Here’s how to prep them:
- Drain and rinse canned kidney beans thoroughly
- Use 15.5 oz cans of dark red kidney beans
- Pat beans dry to prevent excess moisture
- Consider adding an extra can for increased fiber
Time-Saving Preparation Methods
Make your chili prep faster with these tips:
- Chop veggies in advance
- Use pre-minced garlic for quick seasoning
- Organize ingredients before cooking
- Invest in a good food processor
| Ingredient | Preparation Tip | Time Saved |
|---|---|---|
| Onions | Dice uniformly | 5-7 minutes |
| Kidney Beans | Drain and rinse | 2-3 minutes |
| Bell Peppers | Cut into small cubes | 4-5 minutes |
Mastering these prep techniques will make your chili both tasty and quick to make. Your hard work will pay off in every delicious bite.
The Secret to Perfect Ground Beef Browning
Getting the ground beef just right is key to a great chili. You want it to taste rich and deep, just like Wendy’s. This makes your homemade chili a hit with everyone.
Begin with top-notch ground beef. Use 2 pounds with about 80/20 fat content. This mix gives the best flavor and texture. Browning takes 5-7 minutes, so stay focused.
- Use a large skillet with ample surface area
- Break meat into small, consistent chunks
- Cook over medium-high heat
- Stir frequently to prevent burning
Pro tip: Drain excess fat after browning to keep your chili recipe lean and flavorful. Look for a rich, caramelized exterior on the beef chunks. This shows it’s been properly browned and adds deep flavors.
| Beef Browning Stage | Cooking Time | Expected Result |
|---|---|---|
| Initial Cooking | 2-3 minutes | Meat begins to change color |
| Active Browning | 3-4 minutes | Caramelization develops |
| Final Seasoning | 1 minute | Flavor enhancement |
Mastering this step will make your chili as good as Wendy’s. It will be full of rich, complex flavors. Your family and friends will love it.
Mastering the Three-Bean Combination
To make a true bean chili, you need to know the right mix of beans. Wendy’s chili is famous for its special blend of three beans. These beans add depth, texture, and flavor to every bite.
Choosing the right beans is key to getting that classic chili taste. Let’s explore each bean’s role:
Kidney Beans: The Robust Foundation
Kidney beans are the heart of Wendy’s chili. They are:
- Firm in texture
- Rich in earthy flavor
- High in protein
Pinto Beans: Adding Creamy Complexity
Pinto beans add a creamy touch to the chili. They are known for:
- Being soft
- Having a subtle nutty taste
- Soaking up spices well
Great Northern Beans: The Delicate Touch
Great Northern beans round out the mix with their light touch. They offer:
- A mild, light flavor
- A creamy texture
- Supportive background taste
| Bean Type | Texture | Flavor Profile | Nutritional Benefit |
|---|---|---|---|
| Kidney Beans | Firm | Earthy | High Protein |
| Pinto Beans | Creamy | Nutty | Good Fiber |
| Great Northern Beans | Delicate | Mild | Low Calories |
Knowing each bean’s special qualities helps you make a chili as good as Wendy’s. The secret is finding the right balance of these beans for a dish that’s both harmonious and fulfilling.
Creating the Signature Tomato Base
Making the perfect chili starts with a great tomato base. Your Wendy’s-style chili needs a rich, flavorful base that tastes just like the restaurant. The key is using the right mix of tomato products.
To create depth and complexity in your chili, you’ll need a specific blend of tomatoes. Here’s what you’ll need:
- 1 (15 oz) can of tomato sauce
- 1 (15 oz) can of crushed tomatoes
- 1 can of Ro-Tel tomatoes with green chilies
The Ro-Tel tomatoes are a game-changer in this chili recipe. They add a unique mix of diced tomatoes and green chilies. This gives your dish a subtle kick and extra flavor.
| Tomato Product | Quantity | Purpose |
|---|---|---|
| Tomato Sauce | 15 oz | Creates smooth base |
| Crushed Tomatoes | 15 oz | Adds texture |
| Ro-Tel Tomatoes | 1 can | Introduces heat and complexity |
Mix these tomato products well to spread the flavors evenly. This will give you a strong tomato base. Your homemade chili will then taste like it’s straight from Wendy’s.
Spice Blend and Seasoning Techniques
Making the perfect spicy chili is all about finding the right spice mix. This mix turns simple ingredients into a flavorful dish. The right seasonings can take your homemade chili from good to amazing.
Essential Spice Measurements
When making authentic spicy chili, being precise is crucial. Your spice mix should include:
- 1 tablespoon ground cumin
- 1 tablespoon chili powder
- 1 tablespoon granulated sugar (for balanced flavor)
Balancing Heat Levels
Creating the perfect spicy chili is an art of managing heat. Start with a moderate spice level and adjust as needed. Here are some tips:
- Use fresh jalapeños for controlled heat
- Add cayenne pepper sparingly
- Taste and adjust seasonings gradually
Pro tip: Mixing chili powder and cumin gives a deep, rich flavor. This is similar to Wendy’s spicy chili. Remember, you can always add more heat, but you can’t remove it once it’s too spicy!
Perfect Simmering Method and Timing
Making the perfect hearty chili is all about simmering. Your homemade Wendy’s-style chili needs careful attention. This is what makes it truly special.
For the best hearty chili, follow these simmering tips:
- Total cooking time: 45-60 minutes
- Initial beef browning: 10-15 minutes
- Bean and vegetable integration: Additional 15-20 minutes
- Final flavor melding: 15-25 minutes
Temperature control is key when making your hearty chili. Keep the heat low and steady. This lets ingredients blend well without burning. Stir now and then to avoid sticking and ensure even cooking.
| Cooking Stage | Temperature | Duration |
|---|---|---|
| Beef Browning | Medium-High | 10-15 minutes |
| Initial Simmer | Low | 20-25 minutes |
| Final Flavor Blending | Low | 15-20 minutes |
Check the chili’s consistency: it should be thick but not dry. If it’s too thick, add a bit of beef broth. This keeps it moist and prevents burning.
Pro tip: Patience is key. Low and slow cooking lets spices fully develop. This makes your hearty chili taste like it’s from a restaurant, impressing everyone.
Traditional Wendy’s Chili Toppings and Sides
Make your homemade Wendy’s chili special with classic toppings. These toppings can turn a simple meal into a gourmet dish. The right garnishes can elevate your chili to new heights.
Wendy’s has mastered the art of chili toppings over 50 years. When serving your chili, add these classic toppings:
- Shredded Cheddar Cheese
- Finely Diced White Onions
- Sour Cream
- Crispy Saltine Crackers
The secret to great chili toppings is finding the right balance. You want a mix of textures and flavors that enhance the chili’s rich taste.
| Topping | Flavor Profile | Recommended Quantity |
|---|---|---|
| Shredded Cheese | Creamy, Sharp | 2-3 tablespoons |
| Diced Onions | Crisp, Pungent | 1-2 tablespoons |
| Sour Cream | Tangy, Smooth | 1 dollop |
| Crackers | Crunchy, Neutral | 2-3 crackers |
For a spicy twist, add jalapeños or red chili flakes. These small touches can make a big difference, just like Wendy’s does with their chili.
Conclusion
Making Wendy’s chili at home lets you get creative with food and control what you eat. You can tweak ingredients to fit your diet while keeping the dish’s famous taste. This makes it a great meal for everyone.
Your homemade chili is more than a recipe; it’s a skill. It turns a fast-food classic into a personal favorite. Each serving is 8 ounces, low in fat and sodium, making it a healthier choice. You can also adjust the spice, beans, and meat to your liking.
Wendy’s chili is not just a meal; it’s a satisfying experience. It can be enjoyed on its own or with other dishes. Learning this recipe will impress your loved ones and deepen your love for cooking. It turns a simple chili into a tasty, healthy kitchen staple.
Whether you’re planning meals for the week or having a casual get-together, your homemade chili will be a hit. It’s a recipe that celebrates flavor, nutrition, and creativity in cooking.
FAQ
Is Wendy’s chili really made from leftover hamburger patties?
Wendy’s says their chili is made with fresh ground beef. They cook the meat first. Then, they use leftover patties to cut down on waste, but not as old patties.
How can I make Wendy’s chili less spicy?
To make it less spicy, use less chili powder and cumin. You can also add more tomato sauce or diced tomatoes. Sour cream or shredded cheese on top can cool it down too.
Can I make Wendy’s chili vegetarian?
Yes! Use plant-based ground meat or more beans. Mix kidney, pinto, and Great Northern beans. Keep the same vegetables and spices for the real taste.
How long can I store homemade Wendy’s-style chili?
Store it in an airtight container in the fridge for 3-4 days. Freeze it for up to 3 months. Reheat well and stir often to keep it smooth.
What are the best toppings for Wendy’s-style chili?
Top it with shredded cheddar cheese, diced onions, and sour cream. Some like crushed saltine crackers or cornbread for extra texture.
Is Wendy’s chili a healthy meal option?
Wendy’s chili is nutritious, with protein and fiber. A small serving has 170 calories, 15 grams of protein, and is low in fat. But, it’s high in sodium, so watch your salt intake.
Can I make Wendy’s chili in a slow cooker?
Yes! Brown the ground beef first. Then, add all ingredients to the slow cooker. Cook on low for 6-8 hours or high for 3-4 hours for that rich taste.

How to Make the Perfect Wendy’s Chili at Home
- Prep Time: 15 mins
- Cook Time: 1 hr 20 mins
- Total Time: 38 minute
- Yield: 10 servings 1x
- Category: Main Dish
- Method: Simmering
- Cuisine: American
Description
A hearty and flavorful chili recipe inspired by Wendy’s, featuring a combination of ground beef, beans, and vegetables in a rich tomato base.
Ingredients
- 2 tbsp olive oil
- 2 lbs ground beef
- 2 stalks celery, chopped
- 1 onion, chopped
- 1 green bell pepper, chopped
- 3 (14 oz) cans stewed tomatoes
- 1 (14 oz) can tomato sauce
- 1 (10 oz) can diced tomatoes with green chiles (e.g., RO*TEL)
- 1 cup water
- 2 (1.25 oz) packages chili seasoning (e.g., McCormick® Mild Chili Seasoning Mix)
- 1 (14 oz) can kidney beans, undrained
- 1 (14 oz) can pinto beans, undrained
- Salt and ground black pepper to taste
- 1 tbsp white vinegar, or more to taste
Instructions
- Gather all ingredients.
- Heat olive oil in a large pot over medium-high heat. Press ground beef into the hot oil to form one large patty; let the bottom brown for 8-10 minutes.
- Stir and break browned beef into crumbles. Cook until no longer pink, about 5 minutes longer.
- Stir in celery, onion, and bell pepper; cook until onion is translucent, about 5 minutes.
- Pour in stewed tomatoes, tomato sauce, diced tomatoes with green chiles, and water. Break apart large chunks of stewed tomatoes.
- Stir in chili seasoning, kidney beans, and pinto beans. Season with salt and pepper.
- Bring to a boil, then reduce heat to low, and simmer for 1 hour.
- Mix vinegar into chili just before serving.
Notes
- To increase the heat, add cayenne pepper.
- For more beans, double the amount used.
Nutrition
- Calories: 326
- Sugar: 8g
- Sodium: 1521mg
- Fat: 15g
- Saturated Fat: 5g
- Carbohydrates: 29g
- Fiber: 8g
- Protein: 23g
- Cholesterol: 55mg