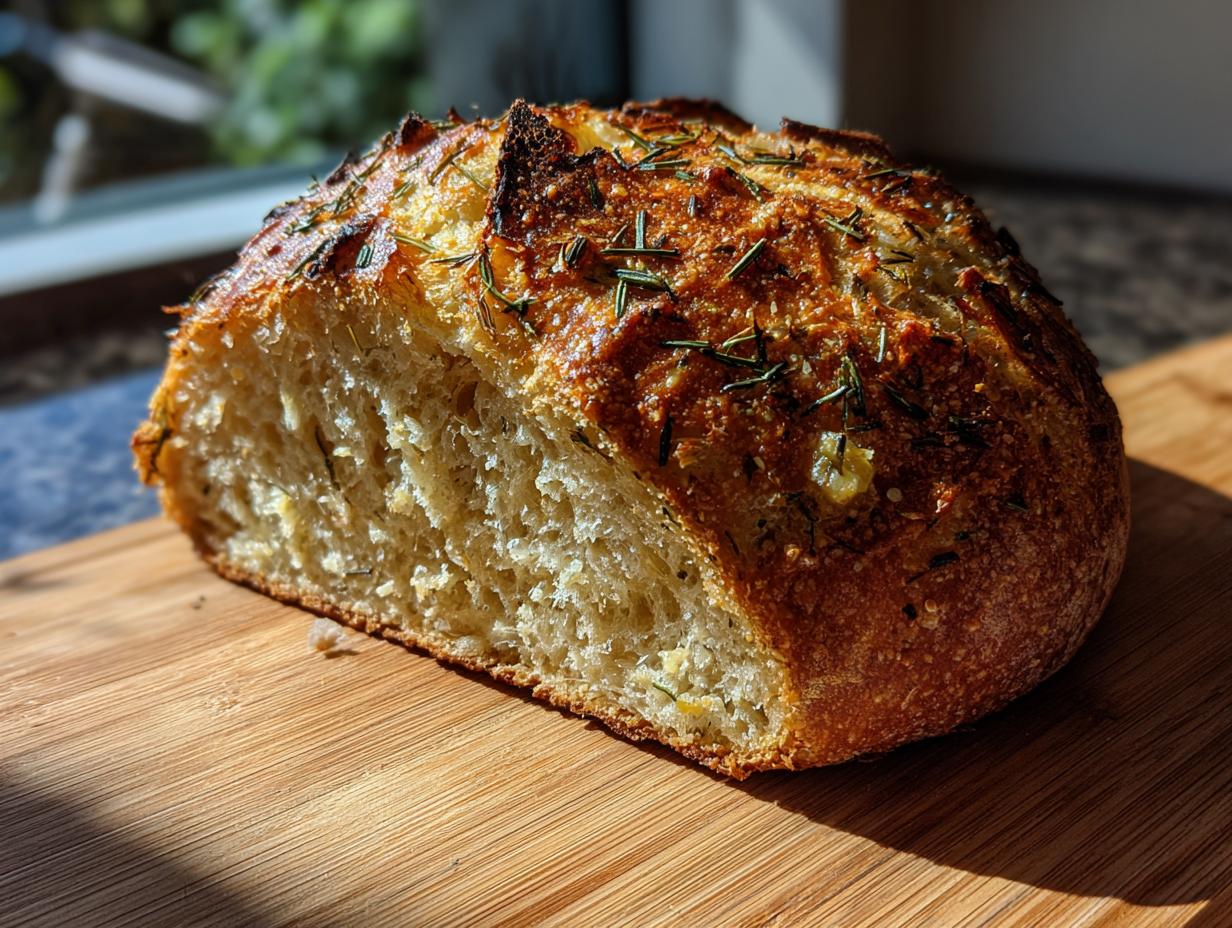
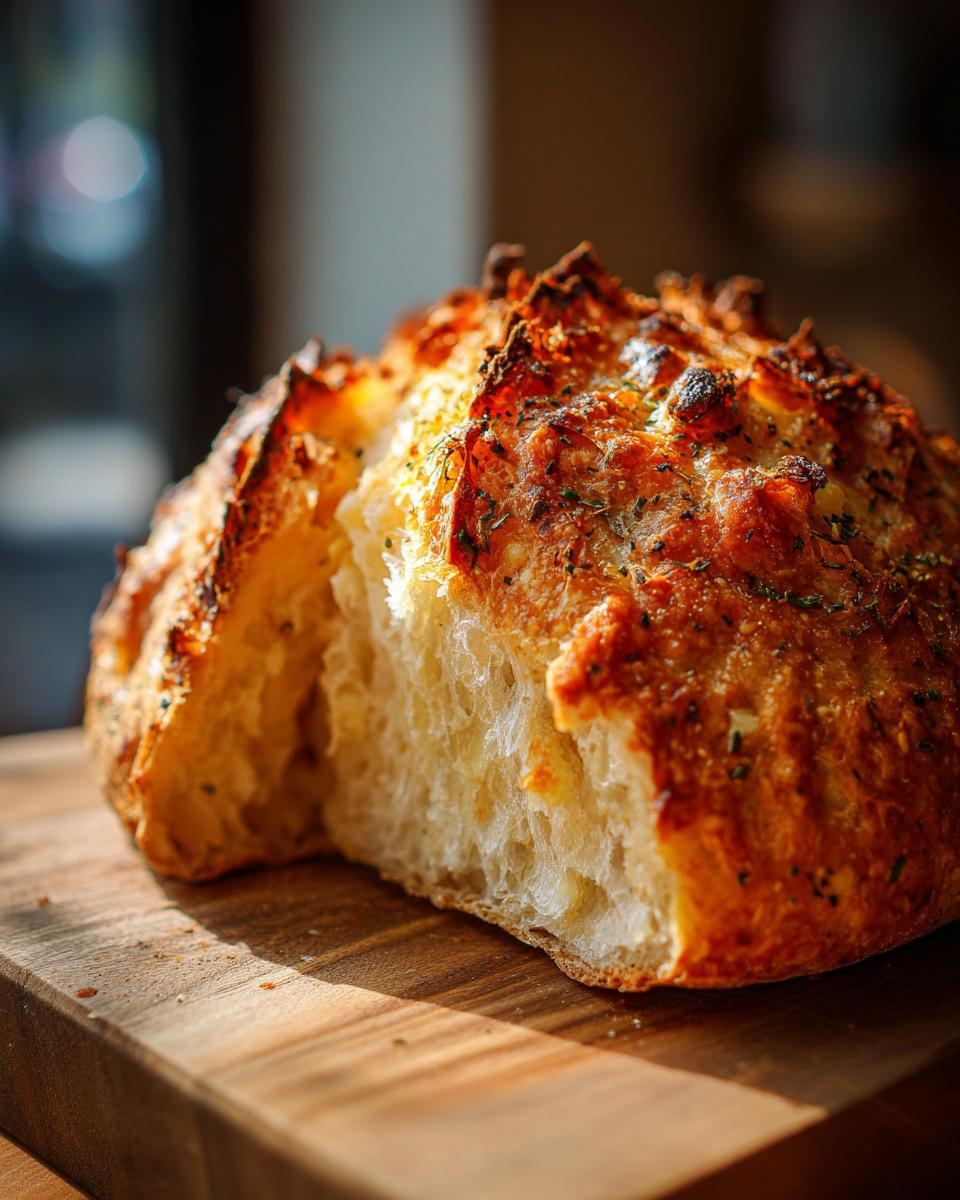
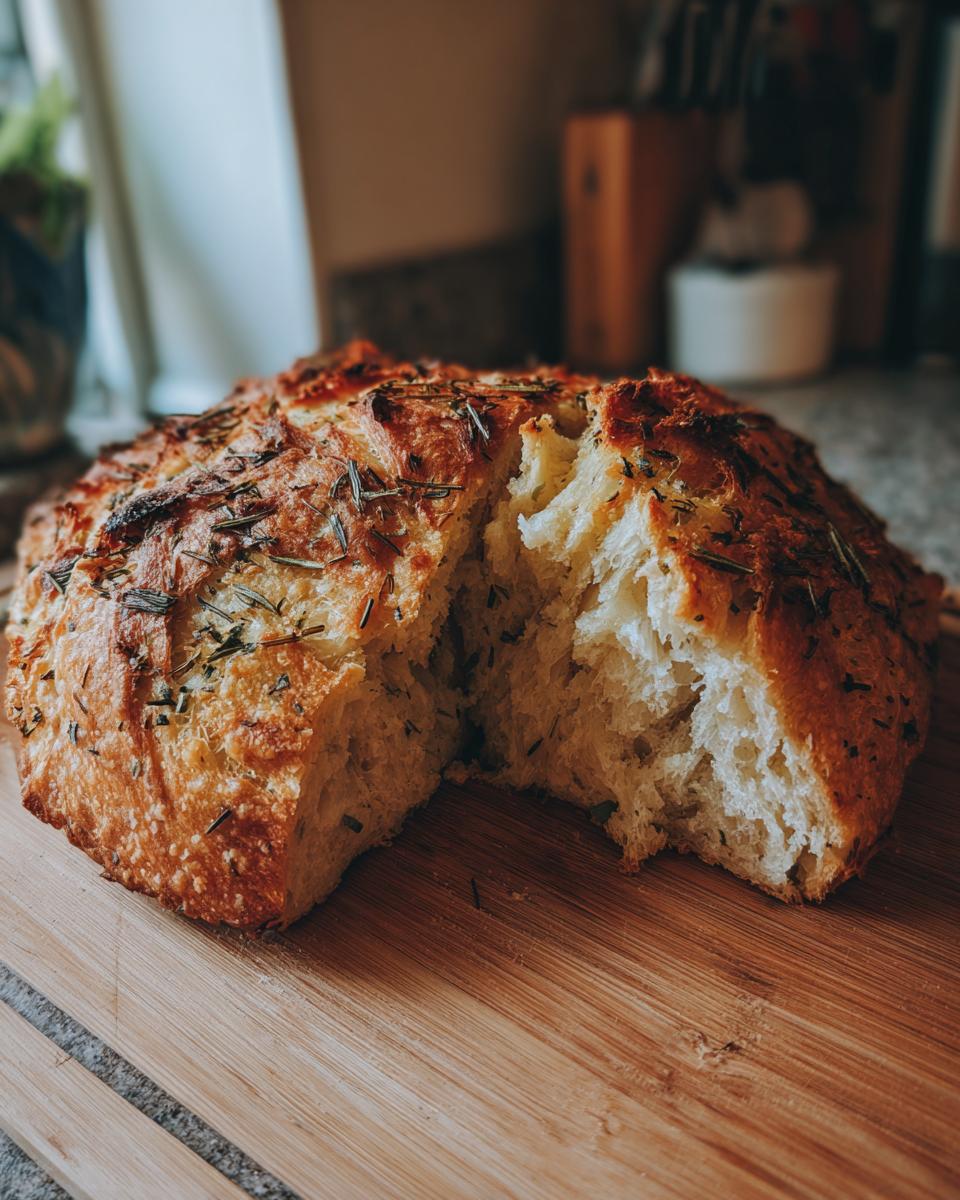
There’s nothing quite like pulling a golden loaf of garlic-herb crusty bread from the oven – that first crackle as you break into the crisp exterior gives me goosebumps every time! What I love most about this recipe is how simple ingredients transform into something magical. Just flour, water, yeast, and a handful of pantry staples create bread with a crackling crust that gives way to a soft, garlicky interior.
I discovered this recipe during a lazy Sunday when I wanted restaurant-quality bread without leaving home. The aroma of roasting garlic and herbs fills your kitchen better than any candle. Trust me, once you taste homemade crusty bread still warm from the oven, you’ll never settle for store-bought again. The best part? No fancy equipment needed – just your hands, a bowl, and about an hour for the dough to work its rising magic.
Garlic-Herb Crusty Bread Ingredients
I always tell my friends – great bread starts with great ingredients! Here’s everything you’ll need to make this simple yet spectacular loaf. Don’t be fooled by the short list – these humble ingredients create magic together.
- 3 cups all-purpose flour – I’ve tried fancy bread flour, but good old AP flour gives the perfect balance of chew and tenderness
- 1 tsp salt – Trust me, don’t skip this! It balances all the flavors beautifully
- 1 tsp sugar – Just enough to wake up the yeast without making the bread sweet
- 1 packet active dry yeast (2 1/4 tsp) – The little powerhouse that makes our bread rise
- 1 1/4 cups warm water – About 110°F – think pleasantly warm bath water
- 3 tbsp olive oil – My secret for that perfect golden crust
- 4 cloves garlic, minced – Fresh is best here – that jarred stuff just won’t give the same punch
- 1 tbsp dried rosemary – Crush it between your fingers to release the oils
- 1 tbsp dried thyme – Rub it gently before measuring to wake up the aroma
See? Nothing fancy or hard to find. I bet you have most of this in your pantry right now! The only “special” equipment you’ll need are your hands and a little patience while the dough rises into something wonderful.
How to Make Garlic-Herb Crusty Bread
Okay, let’s get our hands floury! Making this bread is easier than you think – I promise. Just follow these simple steps, and you’ll have a gorgeous loaf that’ll make your kitchen smell like an Italian bakery.
Mixing and Kneading the Dough
First, grab your biggest mixing bowl – I use the same chipped yellow one my mom gave me when I moved out. Whisk together the flour, salt, sugar, and yeast. Now, here’s my trick: make a little well in the center before adding the warm water and olive oil. This helps everything incorporate evenly.
The dough will look shaggy at first – that’s perfect! Turn it out onto a lightly floured surface (I use my clean countertop) and knead for about 5 minutes. You’re aiming for a smooth, slightly tacky dough that springs back when you poke it. If it sticks to your hands, add just a dusting more flour – but don’t go overboard!
First Rise and Shaping
Pop that beautiful dough ball into a lightly oiled bowl, cover it with a clean kitchen towel (I use my favorite red checkered one), and let it rise somewhere cozy. Near the oven works great! It should double in size in about an hour – but don’t stress about exact timing. The dough is ready when you press two fingers in and the indent stays.
Now the fun part! Punch down the dough (so satisfying) and shape it into a round loaf on a parchment-lined baking sheet. Don’t worry about perfection – rustic is charming! Just tuck the edges under to create surface tension for that perfect rise.
Adding the Garlic-Herb Topping
Here’s where the magic happens! Mix your minced garlic with the rosemary and thyme – I like to crush the dried herbs between my fingers to release their oils. Now gently press this mixture all over the top of your loaf. Don’t be shy – really work it in there! The garlic will toast beautifully in the oven.
Pro tip: If you’ve got fresh herbs, use them! Just double the amount since dried herbs are more concentrated. I sometimes add a sprinkle of flaky sea salt at this stage too – heavenly!
Baking and Cooling
Slide your masterpiece into a preheated 400°F oven and resist the urge to peek! After about 25 minutes, check for that deep golden brown color. The real test? Tap the bottom – it should sound hollow. If not, give it another 5 minutes.
Now comes the hardest part: waiting! Let the bread cool completely on a wire rack before slicing. I know, I know – but this helps set the crumb so you get that perfect texture. The aroma will drive you crazy, but trust me, it’s worth the wait!
Tips for Perfect Garlic-Herb Crusty Bread
After making this bread more times than I can count, I’ve picked up some tricks that make all the difference between good bread and knock-your-socks-off bread. Here are my golden rules for garlic-herb crusty bread perfection:
- Fresh garlic is non-negotiable – That jarred minced stuff just doesn’t have the same punch. Take the extra minute to mince fresh cloves – the flavor difference is night and day!
- Test your yeast – If your water’s too hot, you’ll kill it; too cold and it won’t wake up. The perfect temp? It should feel like warm bath water (about 110°F). Sprinkle in a pinch of sugar – if it doesn’t get foamy after 5 minutes, start over with new yeast.
- Let it rise in a warm spot – My favorite trick? Preheat your oven to the lowest temp for 1 minute, then turn it off and let the dough rise inside with the door slightly ajar. The gentle warmth works like magic.
- Don’t skimp on kneading – That 5 minutes of kneading develops the gluten for that perfect chew. No stand mixer? No problem! I actually prefer hand-kneading – it’s therapeutic and lets me feel when the dough is just right.
- Cool completely before slicing – I know it’s tempting, but cutting into hot bread makes it gummy. That 30-minute wait lets the crumb set up properly. Promise me you’ll wait – your patience will be rewarded!
One last secret? The bread actually tastes better the next day! The garlic and herb flavors mellow and deepen overnight. Just refresh slices in a 350°F oven for 5 minutes to bring back that incredible crunch.
Garlic-Herb Crusty Bread Variations
Once you’ve mastered the basic recipe (and trust me, you’ll want to make it weekly), it’s time to play with fun twists! Here are my favorite ways to mix things up when I’m feeling adventurous:
- Cheese lover’s dream – Fold in 1/2 cup grated parmesan or pecorino to the dough, then sprinkle another 1/4 cup on top before baking. The cheese forms this incredible golden crust that’ll have you picking at the crispy bits before the bread even cools!
- Whole wheat boost – Swap out 1 cup of all-purpose flour for whole wheat. You’ll get this nutty depth that pairs beautifully with the garlic. Just add an extra tablespoon of water since whole wheat absorbs more moisture.
- Herb swap – Out of rosemary and thyme? No problem! I’ve used everything from oregano to herbes de Provence. My current obsession? A tablespoon of za’atar mixed with the garlic – it’s life-changing!
- Roasted garlic magic – Instead of raw garlic, mash in 4-5 cloves of roasted garlic. The flavor becomes sweeter and more mellow – perfect for when you want that garlic punch without the sharpness.
- Everything bagel twist – After adding the garlic-herb topping, sprinkle on some everything bagel seasoning. The sesame seeds, poppy seeds, and onion flakes add incredible texture and flavor.
The best part? You can mix and match these ideas! Last week I made a version with roasted garlic, asiago cheese, and a sprinkle of red pepper flakes that disappeared before it even cooled. Don’t be afraid to experiment – that’s how all the best recipes are born!
Storing and Reheating Garlic-Herb Crusty Bread
Let’s talk about keeping that gorgeous loaf fresh (if it lasts that long)! I’ve learned the hard way that crusty bread needs special care – nothing’s sadder than finding your masterpiece turned into a rock the next day. Here’s how I keep every slice tasting just-baked fresh.
For short-term storage, wrap the cooled loaf tightly in a clean kitchen towel and tuck it into a paper bag. This keeps the crust crisp while preventing the inside from drying out. It’ll stay perfect this way for about 2 days on the counter – though in my house, it rarely lasts that long!
If you need to keep it longer, freezing is your friend. Slice the cooled bread first (trust me, trying to slice frozen bread is a nightmare), then wrap individual portions in foil before popping them in a freezer bag. They’ll keep for up to 3 months this way. When the craving hits, just grab a slice or two – no need to thaw the whole loaf.
Now, for the magic trick to revive day-old bread: Preheat your oven to 350°F while you take the bread out of storage. Sprinkle the loaf or slices lightly with water (I just flick droplets from my fingers), then bake for 5-8 minutes. That quick steam bath works wonders! The crust will crisp up beautifully while the inside stays soft and warm.
One word of warning: never microwave crusty bread unless you want a sad, rubbery mess. I learned this the hard way during a late-night snack emergency. The oven method takes a few extra minutes, but that crunch is worth every second!
Pro tip: If you’ve got leftover slices that are past their prime, don’t toss them! They make incredible garlic breadcrumbs for salads or croutons for soup. Just pulse in the food processor or tear into chunks, toss with olive oil, and toast in a 300°F oven until golden. Waste not, want not!
Garlic-Herb Crusty Bread FAQs
Can I use fresh yeast instead of dry?
Absolutely! I use fresh yeast all the time when I can find it. Swap the packet of dry yeast for a 0.6 oz cake of fresh yeast. Crumble it right into your flour mixture – no need to dissolve it first. Fresh yeast gives the bread this incredible lift and slightly sweeter flavor that I just adore. Just remember it doesn’t keep as long as dry yeast, so use it within a week or two.
Why did my loaf turn out dense?
Oh no! We’ve all been there. Dense bread usually means your yeast wasn’t active enough or the dough didn’t rise properly. First, make sure your water wasn’t too hot (it kills yeast) or too cold (it won’t wake up). That perfect 110°F is key. Also, don’t skip the full hour rise – I sometimes let mine go 90 minutes if my kitchen is chilly. And whatever you do, resist the urge to add extra flour when kneading – too much makes bricks, not bread!
Can I freeze this bread?
You bet! I always make a double batch just for freezing. Let the bread cool completely, then slice it first (trying to slice frozen bread is a nightmare, take my word for it). Wrap slices in foil, then pop them in a freezer bag. They’ll keep beautifully for 2-3 months. When a craving hits, just take out what you need and reheat at 350°F for 5-8 minutes. Tastes just-baked every time!
Can I use fresh herbs instead of dried?
Yes, and sometimes I prefer it! Fresh herbs give this incredible brightness that dried can’t match. Just double the amount since fresh herbs are less concentrated. My favorite combo is fresh rosemary and thyme from my little kitchen garden. Chop them fine and mix with the garlic – the aroma while baking is heavenly! Pro tip: add some chopped fresh parsley too for gorgeous green flecks.
How do I know when the bread is fully baked?
Trust me, you’ll want to get this right. The golden color is your first clue, but the real test is the sound. Carefully lift the loaf and tap the bottom – it should sound hollow, like knocking on a door. If it still sounds dense, give it another 5 minutes. Also check the internal temp if you’re unsure – 190-200°F means it’s perfect. And don’t worry if the garlic gets a little dark – those crispy bits are actually the best part!
Nutritional Information
Okay, let’s be real – none of us are eating this garlic-herb crusty bread because we’re counting calories! But since you asked (or your nutrition-conscience friend did), here’s the scoop on what’s inside each glorious slice.
A standard serving (about one hearty slice) comes in around 150 calories, with most of that coming from those delicious carbs that make bread so satisfying. The olive oil adds heart-healthy fats, while the garlic and herbs pack tiny punches of beneficial plant compounds.
Important note: These numbers are estimates based on standard ingredients – your actual counts might vary depending on exact measurements and brand choices. Did you go heavy on the garlic? Add extra cheese? Use whole wheat flour? All those tweaks will change the numbers slightly.
At the end of the day, this is homemade food made with simple, real ingredients – no preservatives, no mystery additives. That’s nutritional win in my book! Now go enjoy your bread guilt-free (maybe with an extra smear of butter while it’s still warm… I won’t tell).
For more delicious recipes and inspiration, check out Cooking with Judy on Pinterest.
Print
Irresistible Garlic-Herb Crusty Bread in 1 Hour
- Prep Time: 1 hour 10 minutes
- Cook Time: 30 minutes
- Total Time: 1 hour 40 minutes
- Yield: 1 loaf 1x
- Category: Bread
- Method: Baking
- Cuisine: Mediterranean
- Diet: Vegetarian
Description
A simple and flavorful garlic-herb crusty bread with a crispy exterior and soft interior.
Ingredients
- 3 cups all-purpose flour
- 1 tsp salt
- 1 tsp sugar
- 1 packet active dry yeast (2 1/4 tsp)
- 1 1/4 cups warm water
- 3 tbsp olive oil
- 4 cloves garlic, minced
- 1 tbsp dried rosemary
- 1 tbsp dried thyme
Instructions
- In a bowl, mix flour, salt, sugar, and yeast.
- Add warm water and olive oil, then stir until a dough forms.
- Knead the dough on a floured surface for 5 minutes.
- Place dough in a greased bowl, cover, and let rise for 1 hour.
- Preheat oven to 400°F (200°C).
- Punch down dough and shape into a round loaf.
- Mix minced garlic, rosemary, and thyme, then press into the dough.
- Bake for 25-30 minutes until golden brown.
- Cool before slicing.
Notes
- Let the dough rise in a warm place for best results.
- Adjust herbs to your preference.
- Store leftovers in an airtight container.
Nutrition
- Serving Size: 1 slice
- Calories: 150
- Sugar: 1g
- Sodium: 200mg
- Fat: 4g
- Saturated Fat: 1g
- Unsaturated Fat: 3g
- Trans Fat: 0g
- Carbohydrates: 25g
- Fiber: 1g
- Protein: 4g
- Cholesterol: 0mg
Keywords: garlic bread, herb bread, crusty bread, homemade bread