Oh my gosh, let me tell you about my secret weapon for effortless entertaining—the snack board! Nothing makes me happier than throwing together a gorgeous spread in 15 minutes flat when friends drop by unexpectedly. I swear by these versatile platters because they work for any occasion—game nights, book clubs, or just treating yourself to a fancy solo snack session.
My obsession started when I hosted my first big holiday party. I was scrambling at the last minute (as usual), and suddenly remembered the snack board trick my aunt taught me. Twenty minutes later, I had this stunning centerpiece that looked like I’d spent hours arranging. The best part? Everyone could graze while chatting, and cleanup was a breeze. Now I keep my pantry stocked with all the essentials so I’m always ready for impromptu gatherings.
Why You’ll Love This Snack Board
Trust me, once you try this snack board approach, you’ll wonder how you ever entertained without it! Here’s why it’s my go-to solution:
- Lightning-fast prep: I can throw this together in 15 minutes flat when surprise guests arrive
- Endless customization: Swap ingredients based on what’s in your fridge or your guests’ preferences
- Universal crowd-pleaser: There’s something for everyone – picky eaters, foodies, and kids alike
- Almost no cleanup: Just toss the board in the dishwasher (or lick it clean – no judgment here!)
- Looks impressive: People will think you’re some kind of gourmet host when really, it’s just smart snacking
Seriously, this is entertaining magic on a platter!
Ingredients for Your Perfect Snack Board
Okay, let’s talk building blocks! After years of snack board experiments (and a few delicious disasters), I’ve nailed down the perfect ingredient ratios. Here’s exactly what I keep stocked for last-minute entertaining magic:
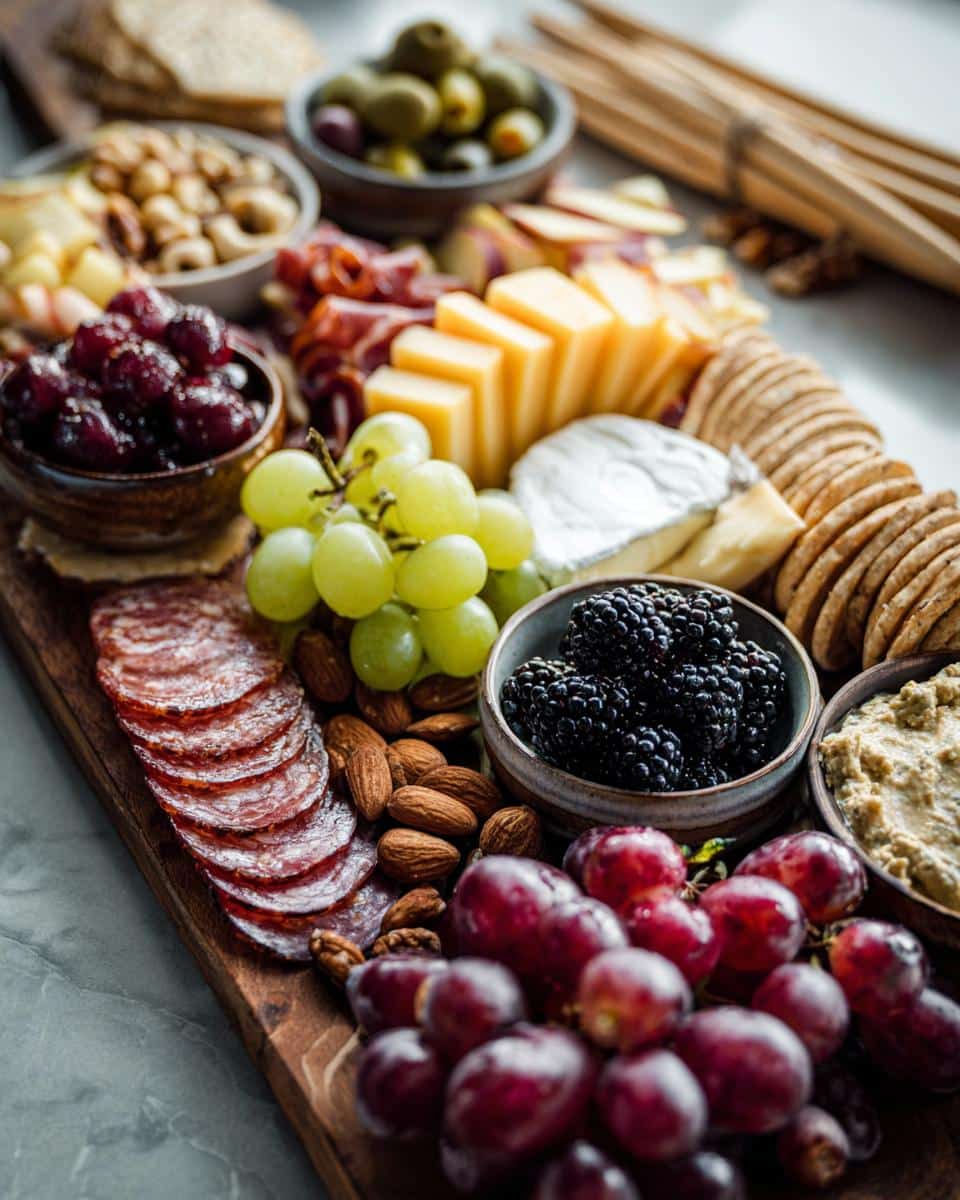
- Cheese trio (1 cup total): Always a mix – sharp cheddar cubes, creamy brie wedges, and smoked gouda slices are my holy grail
- Cured meats (3/4 cup): Folded prosciutto, salami rolls, and pepperoni coins add that fancy touch
- Fresh fruits (1 heaping cup): Red grapes still on the vine, strawberry halves, and apple slices dunked in lemon water
- Crunchy bits (1 cup): Marcona almonds, honey-roasted peanuts, and those addictive little pretzel twists
- Salty bites (1/2 cup): Kalamata olives with pits removed (trust me, no one wants that surprise!)
- Crisp vehicles (3/4 cup): Water crackers, toasted baguette slices, and breadsticks for scooping
- Dippables (1/4 cup each): Stone-ground mustard in a tiny jar and whipped honey goat cheese
Pro tip from my messy learning curve – prep fruits last so they stay fresh-looking!
How to Assemble Your Snack Board Like a Pro
Alright, let me walk you through my foolproof assembly method – the one that always gets me those “Wow, you made this?!” compliments. I’ve learned through trial and error (mostly error) that order matters when building snack boards!
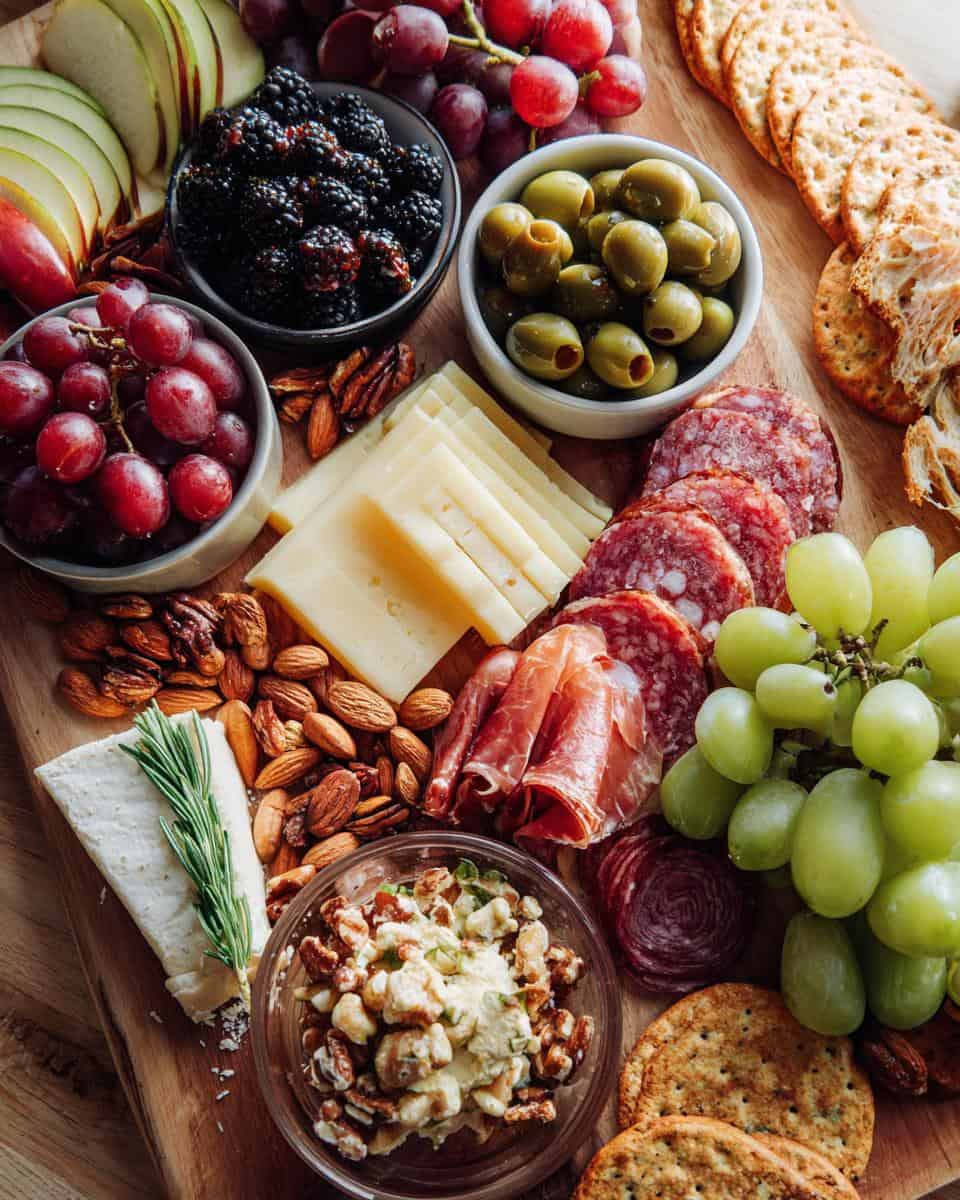
- Start with your anchors: Place cheeses first in triangular positions – this creates visual balance. I like to put the brie wedge at 12 o’clock and fan out from there.
- Add your meats artfully: Fold prosciutto into pretty ruffles and roll salami into little cones – it makes such a difference! Keep them near cheeses for easy pairing.
- Fill in with fruits & veggies: Cluster grapes, berries, and apple slices in empty spots. Pro tip? Put citrus-soaked apples near meats to prevent browning.
- Scatter the crunchies: Toss nuts and crackers in remaining gaps, but keep them separate from moist items (soggy crackers = snack tragedy).
- Last-minute touches: Add dips in cute ramekins right before serving – chilled dips stay firmer for scooping!
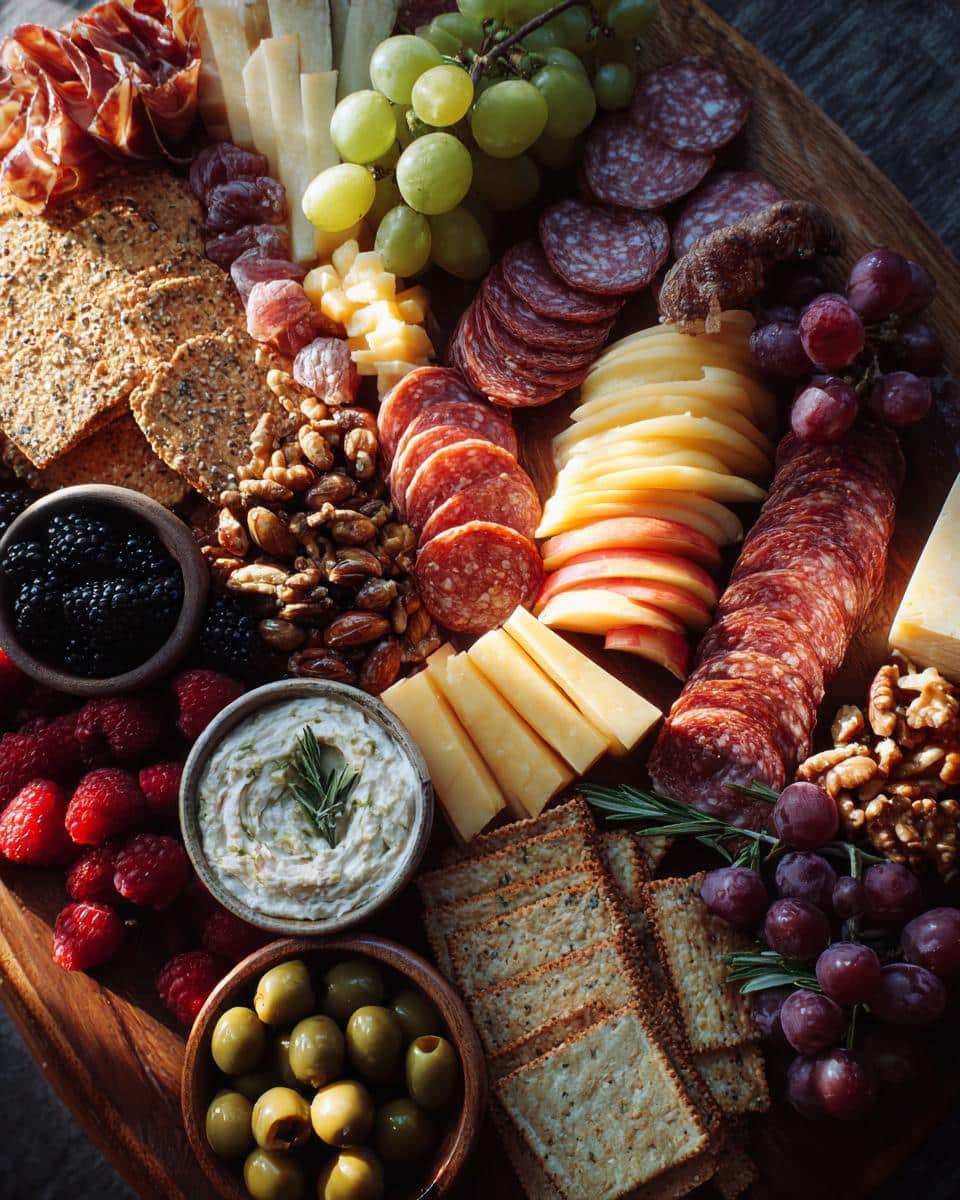
Remember: Your snack board should look bountiful but not overcrowded. Leave some “breathing room” between items – it makes everything more inviting!
Choosing the Right Board
I use a 16″ wooden cutting board for small gatherings – the grain shows off food beautifully. For bigger parties, a marble slab keeps cheeses perfectly chilled!
Arrangement Tips for Maximum Appeal
Create contrast by pairing vibrant fruits with pale cheeses. Alternate shapes too – round grapes next to cubed cheese, sliced meats beside whole nuts. Your eyes should dance across the board!
Customizable Snack Board Variations
Oh, the possibilities! Once you’ve mastered the basic snack board, it’s time to play with themes and twists. My favorite part? You can completely transform the vibe with just a few ingredient swaps. Here are my go-to variations that always impress:
- Mediterranean Magic: Swap in feta cubes, dolmas, roasted red peppers, and tzatziki with pita chips
- Breakfast Bonanza: Mini pancakes, maple sausage links, yogurt cups with granola, and fresh berries
- Vegan Delight: Cashew cheese rounds, marinated tofu bites, spiced nuts, and dairy-free ranch dip
- Game Day Glory: Spicy pretzels, buffalo chicken dip, celery sticks, and mini sliders on brioche
See? One board, endless personalities – just like your guest list!
Serving and Storage Tips for Your Snack Board
Here’s my golden rule: serve your snack board at room temperature for maximum flavor! Cold cheeses lose their personality, and meats taste so much better when they’ve had a chance to breathe. If you need to prep ahead (we’ve all been there), assemble everything except the dips and crackers, then lightly cover the board with a damp kitchen towel – this keeps fruits from drying out without making crackers soggy. Honestly? These beauties are best enjoyed within 2 hours, but leftovers (if any!) keep surprisingly well in the fridge overnight. Just refresh with new crackers in the morning!
Nutritional Information
Just a heads up – these nutritional values are estimates and can vary depending on the specific ingredients and brands you choose for your snack board.
FAQs About Snack Boards
You’ve got questions? I’ve got answers – plus some hard-earned wisdom from all my snack board adventures (and mishaps!). Here are the things people ask me most:
Can I prep a snack board ahead of time?
Absolutely! I often assemble mine 2-3 hours before guests arrive – just hold off on crackers and anything that might wilt. Cover loosely with a damp paper towel to keep everything fresh. The only no-no? Adding dips too early – they’ll make everything soggy!
How do I keep apple slices from browning?
My favorite trick: soak them in ice water with a squeeze of lemon for 5 minutes. The acid prevents oxidation, and the cold water keeps them crisp. Just pat them dry before arranging!
What if I don’t have a fancy board?
Honey, I’ve used baking sheets, serving trays, even a clean cutting board in a pinch! The magic is in the arrangement, not the surface. Just make sure whatever you use is food-safe.
How much should I make per person?
For a party snack board, I plan about 1/2 cup total ingredients per person. But trust me, people always eat more than you expect – especially with those addictive little salami rolls!
Can I make a snack board for one?
Are you kidding? My solo “self-care snack boards” are legendary! Scale down the portions and enjoy your personal charcuterie moment – no sharing required.
Ready to Wow Your Guests?
Now it’s your turn! Snap a pic of your snack board masterpiece and tag me – I live for seeing your creative twists. Check out more ideas on my Pinterest!
Trust me, once you start, you’ll be hooked on this effortless entertaining magic. Happy snacking!
Print
15-Minute Snack Board Magic That Wows Every Guest
- Prep Time: 15 minutes
- Cook Time: 0 minutes
- Total Time: 15 minutes
- Yield: 4-6 servings 1x
- Category: Appetizer
- Method: No-Cook
- Cuisine: International
- Diet: Low Lactose
Description
A snack board is a versatile and easy-to-prepare platter that combines various snacks for sharing or solo enjoyment. Perfect for gatherings or a quick bite.
Ingredients
- 1 cup mixed nuts
- 1 cup sliced cheese
- 1 cup fresh fruit (grapes, berries, apple slices)
- 1 cup cured meats (salami, prosciutto)
- 1/2 cup olives
- 1/2 cup crackers or breadsticks
- 1/4 cup dips (hummus, mustard, or yogurt-based)
Instructions
- Choose a large board or platter.
- Arrange cheeses and meats in separate sections.
- Add fruits, nuts, and olives in small bowls or directly on the board.
- Place crackers or breadsticks in empty spaces.
- Add dips in small containers.
- Serve immediately or cover and refrigerate for up to 2 hours.
Notes
- Use seasonal fruits for freshness.
- Adjust quantities based on the number of guests.
- Keep nuts and crackers separate to maintain crispness.
Nutrition
- Serving Size: 1 serving
- Calories: 250
- Sugar: 8g
- Sodium: 300mg
- Fat: 18g
- Saturated Fat: 6g
- Unsaturated Fat: 10g
- Trans Fat: 0g
- Carbohydrates: 15g
- Fiber: 3g
- Protein: 10g
- Cholesterol: 25mg
Keywords: snack board, appetizer, party food, easy snack